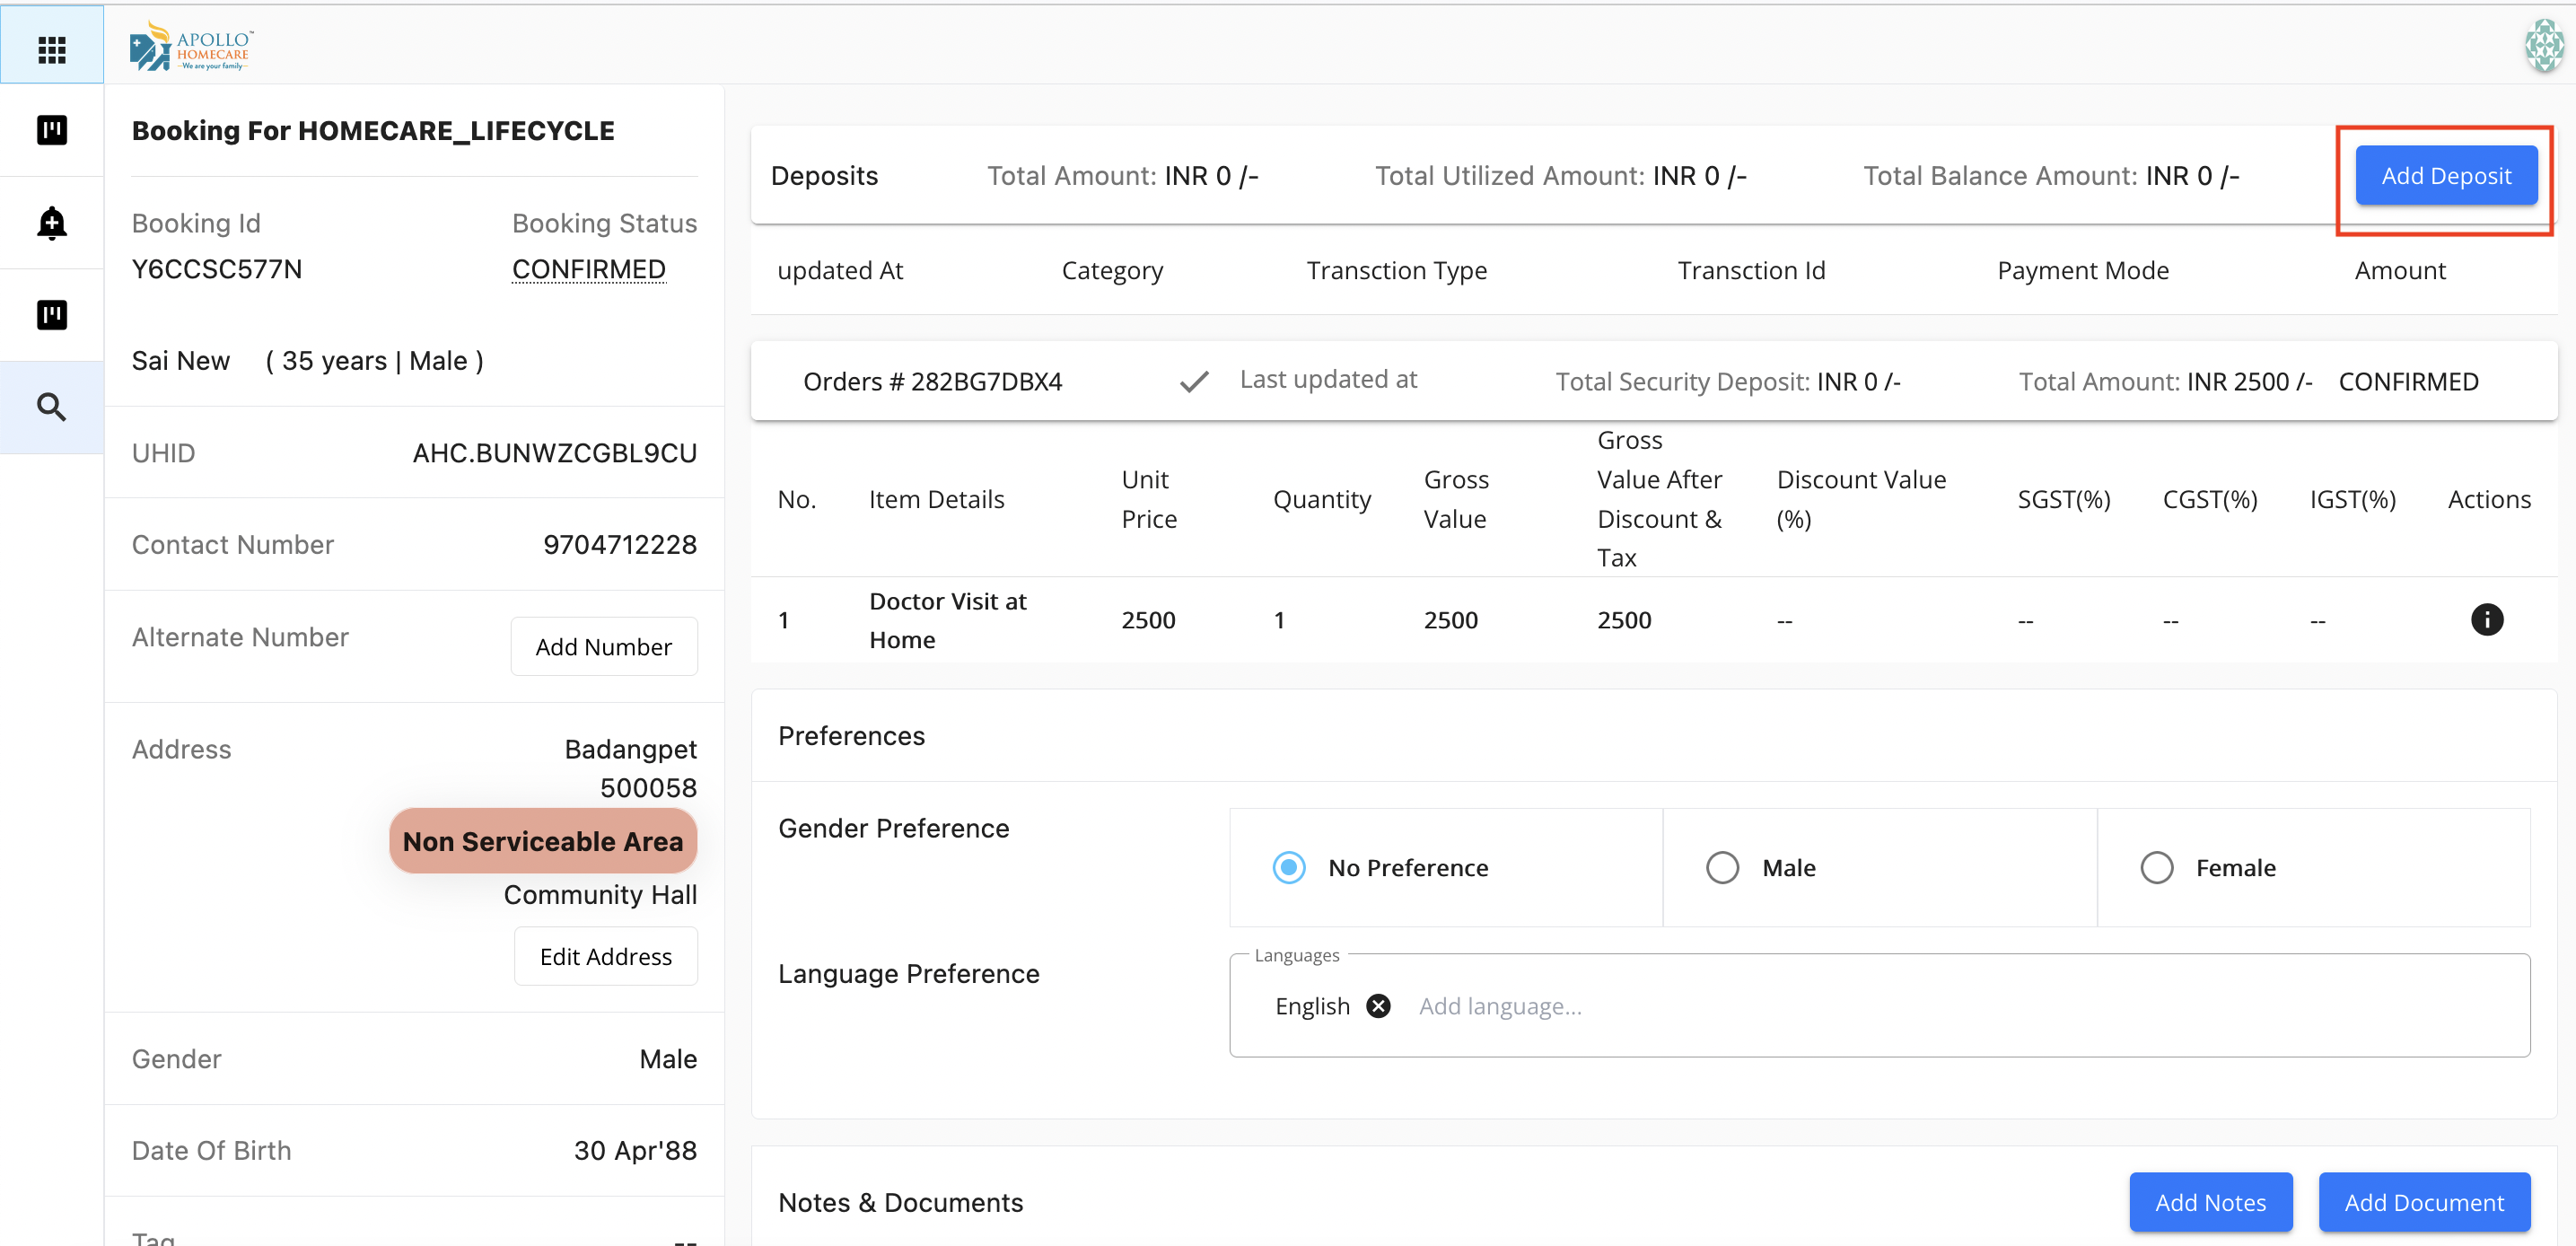
Patient Billing
Online
Send Payment Link, View Complete Billing Log, Refund Approval Flow, Track of Borrowed Credit, Automated Invoice so on... - Everything you asked for is available now in Apollo Josh!
Generate Estimation/Payment Link
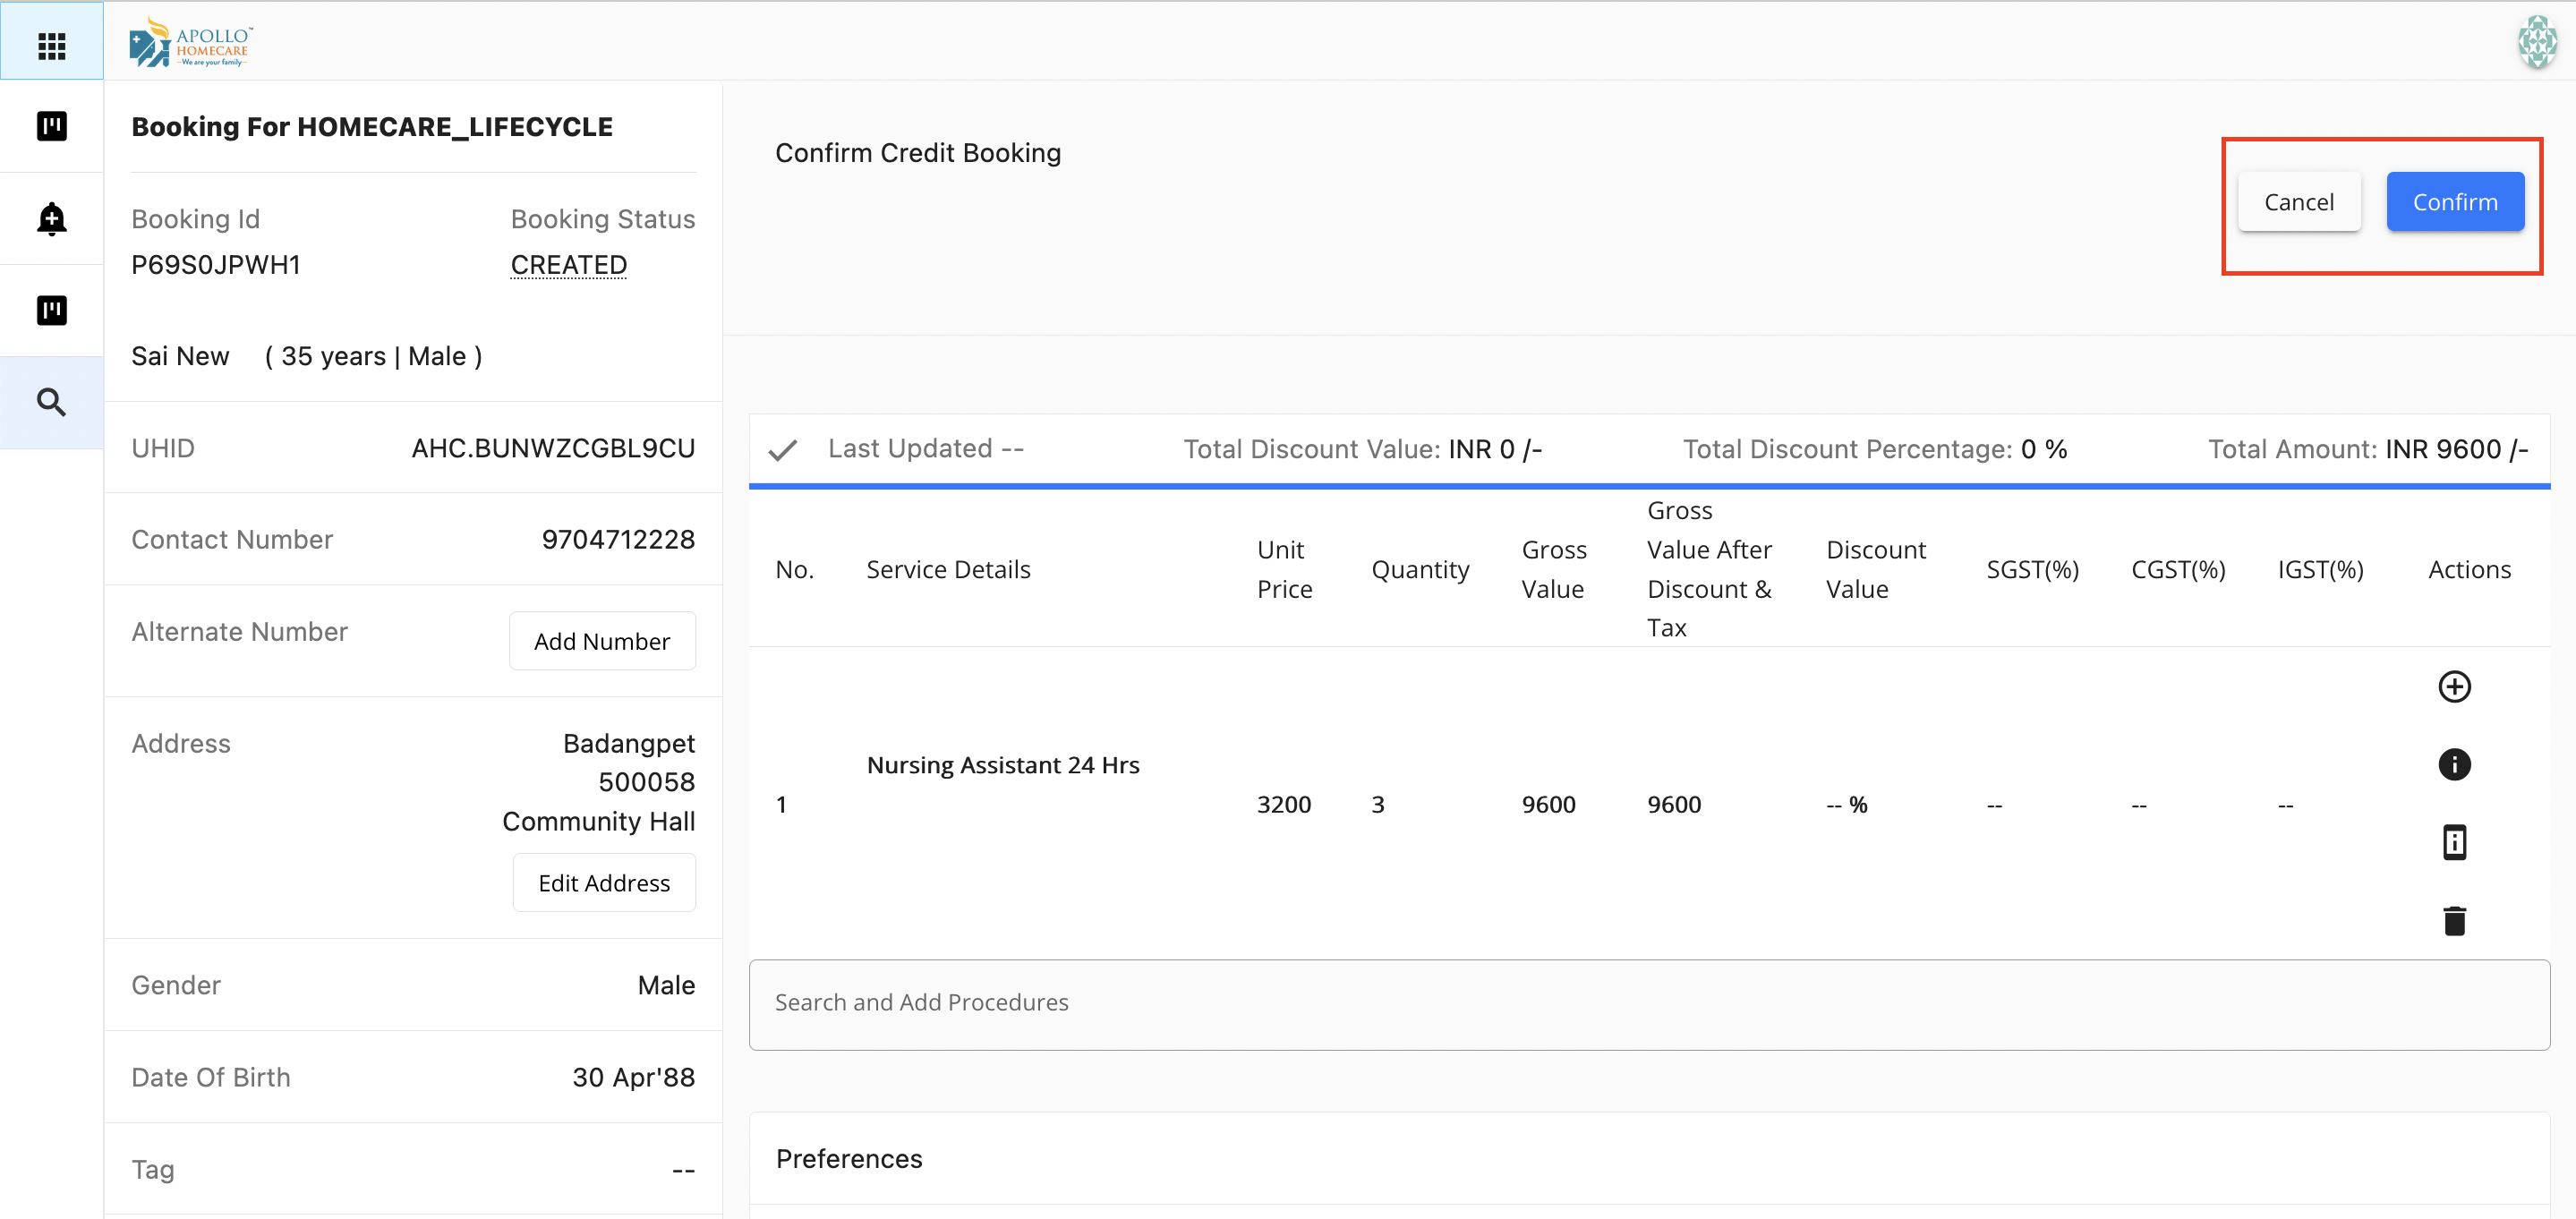
- Post clicking on "Confirm"
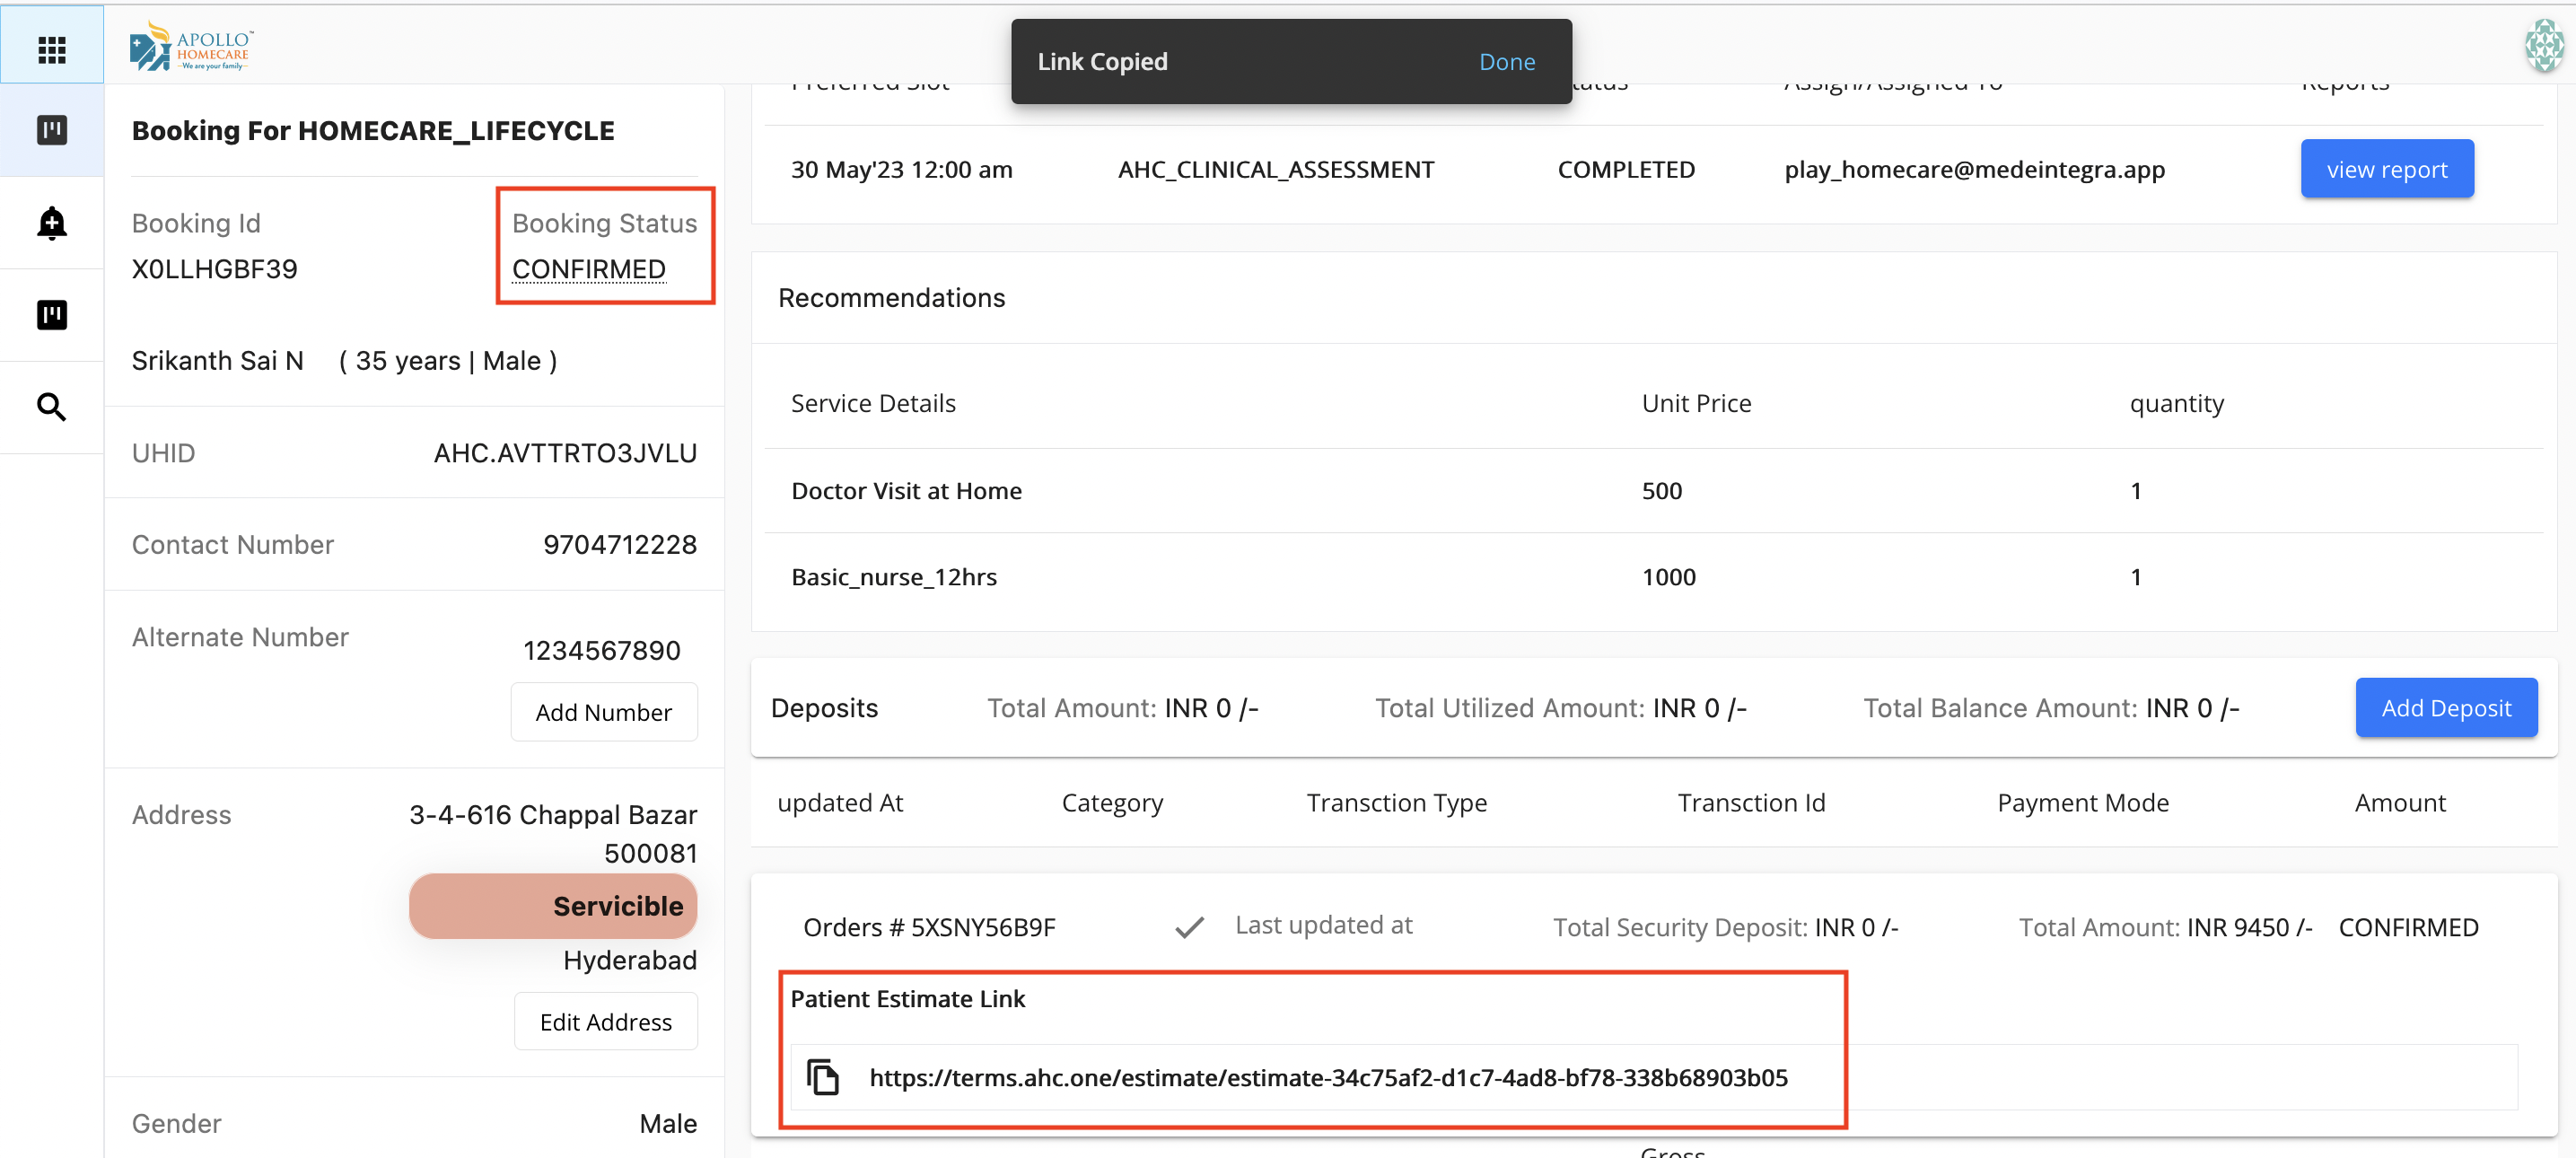
- Click on Order
- Copy the Patient Link and share to patient only if patient has not received the SMS/Whatsapp
- System will automatically updates the status to "Confirm"
Update Status to Confirm
Post Clicking on confirm, estimate link will be generated

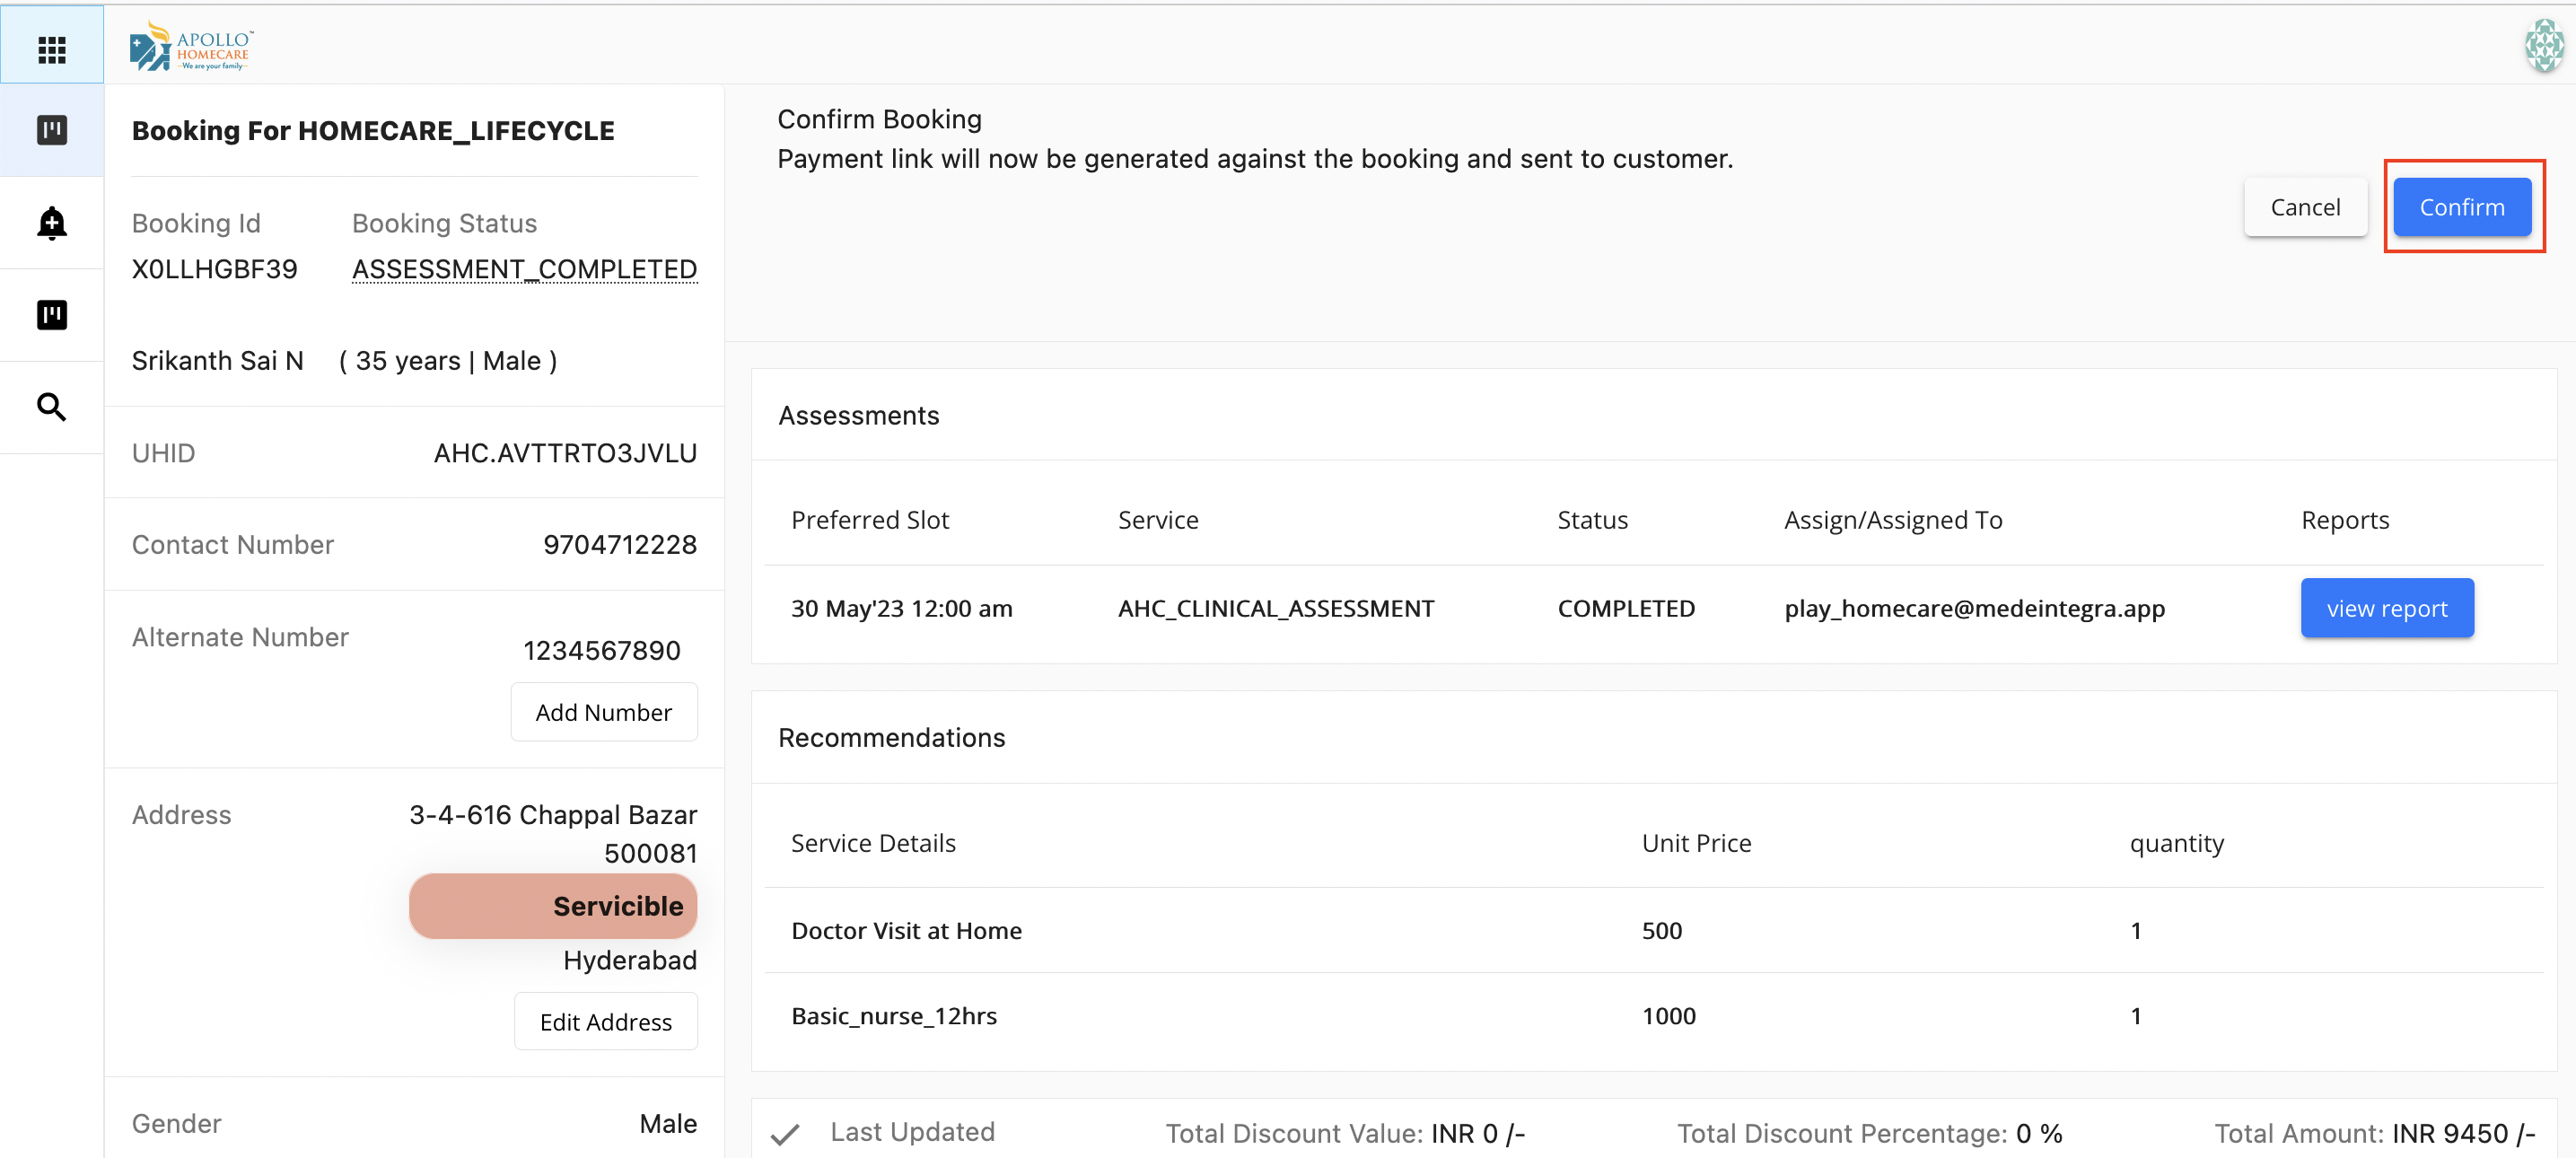
Against Order Estimate Link
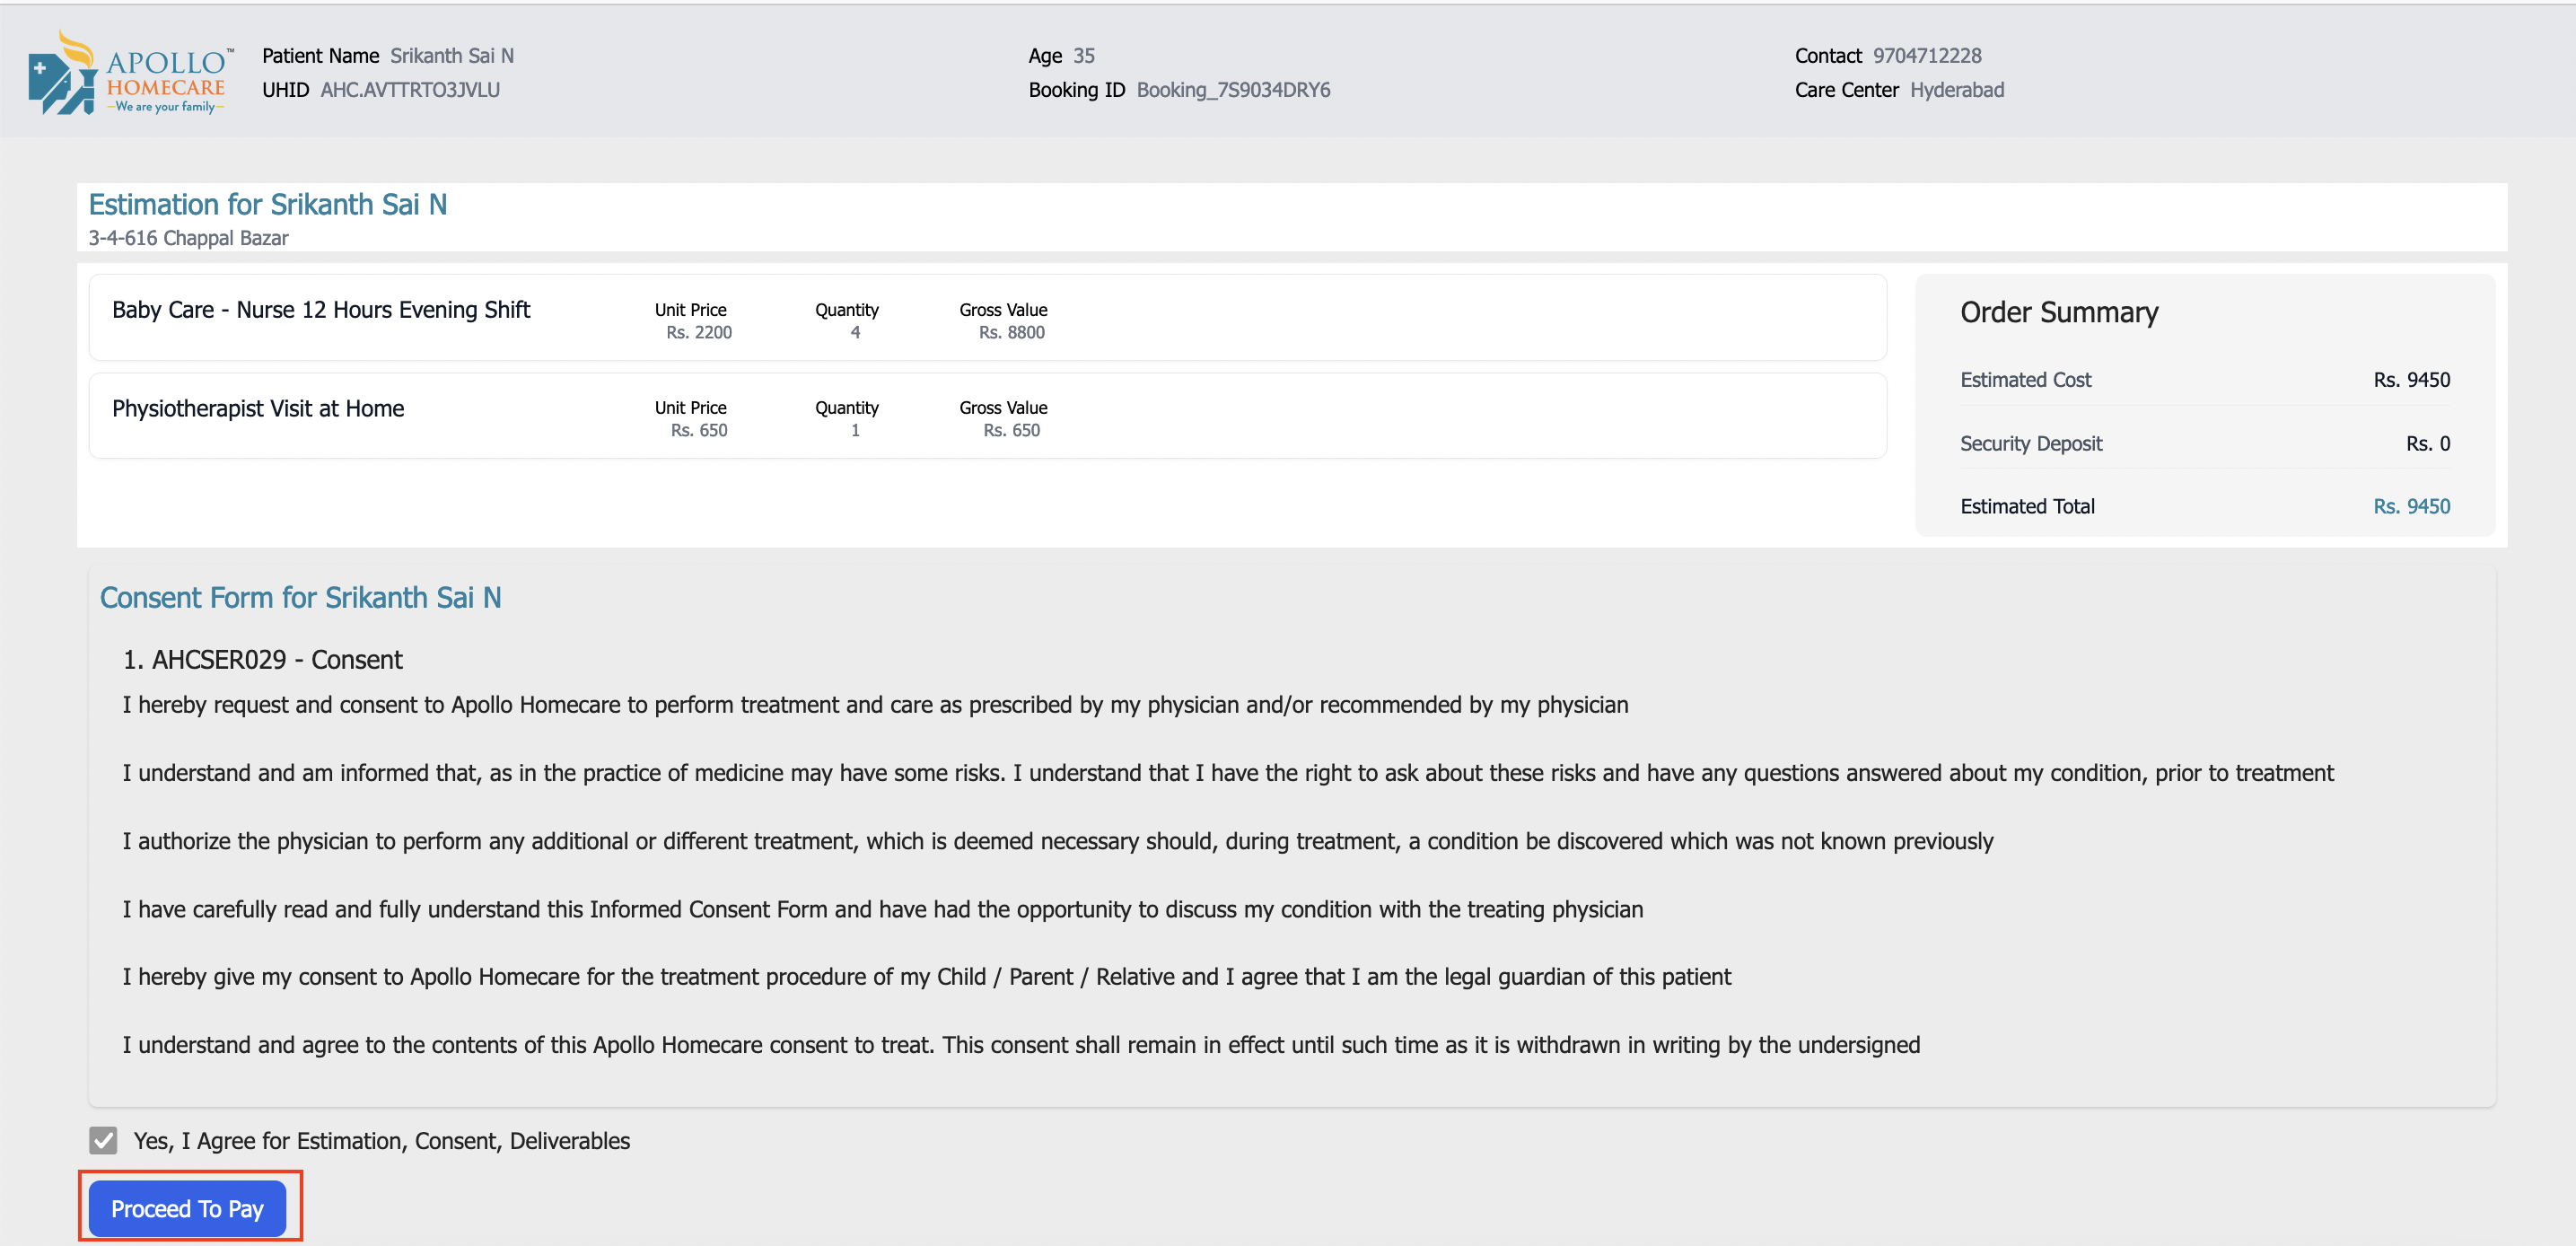
Patient Side - Estimation/Consent
- Post Clicking on the Link, Patient Views the Estimation
- Patient Views the Consent & Agreement
- Patient need to click on the checkbox - I agree
- Clicks on "Proceed to Pay"
- After clicking on "Proceed to Pay", system will redirect to Razorpay Payment Link
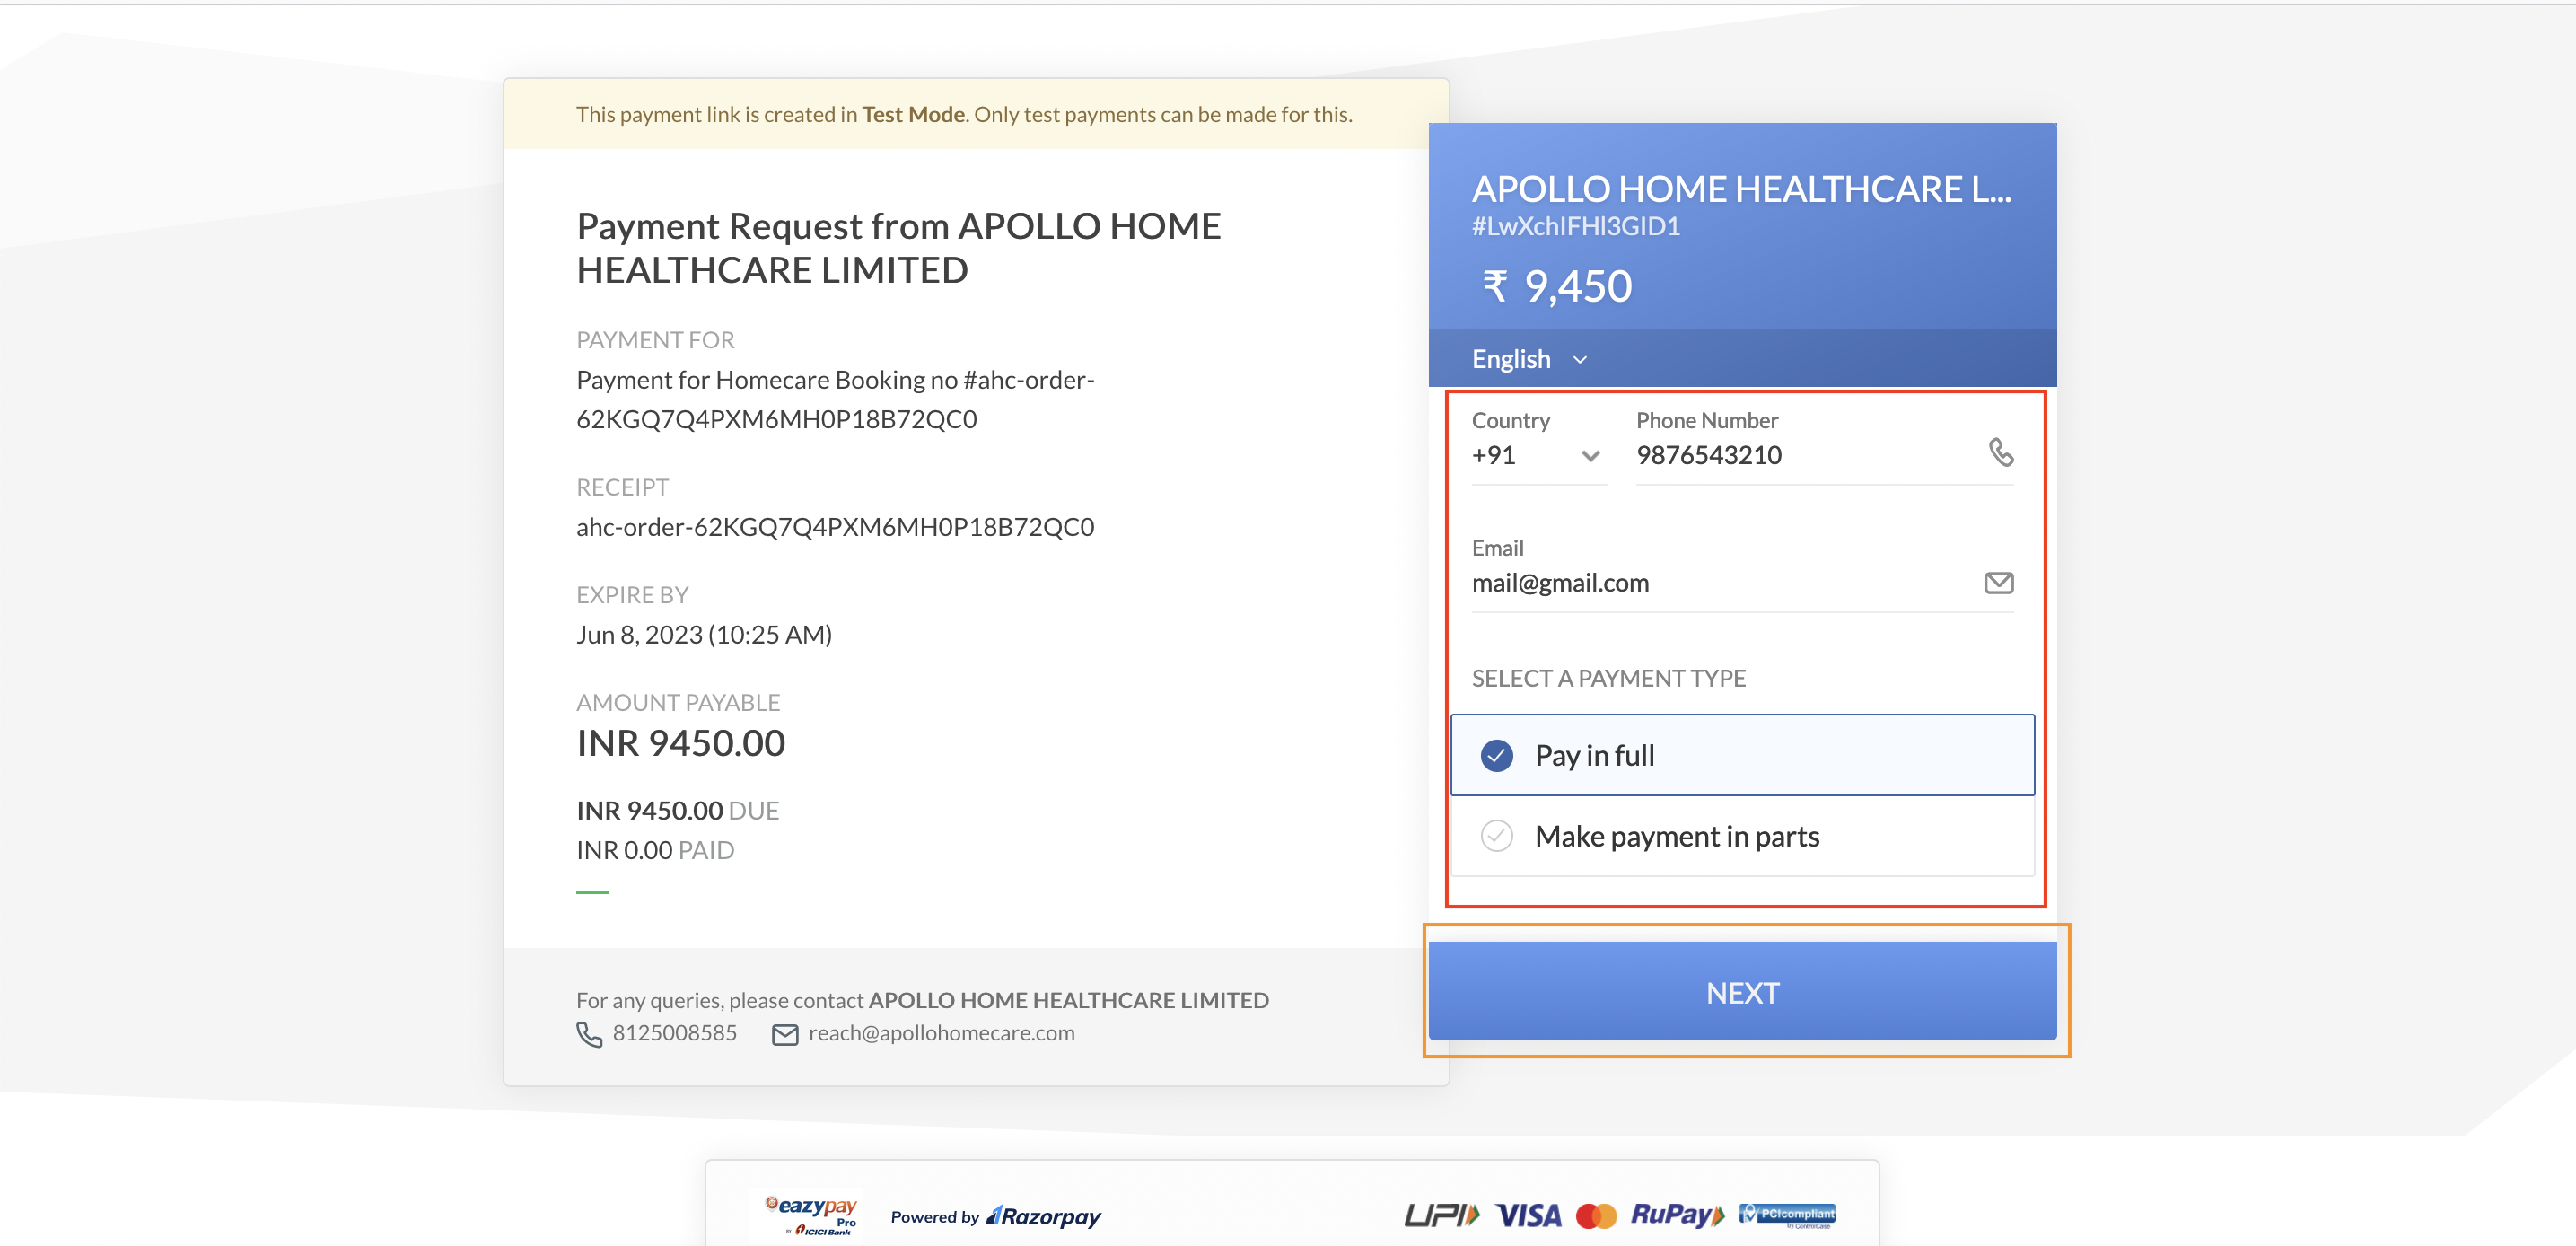
- Patient Enters the email ID and phone number
- Selects "Pay in Full"
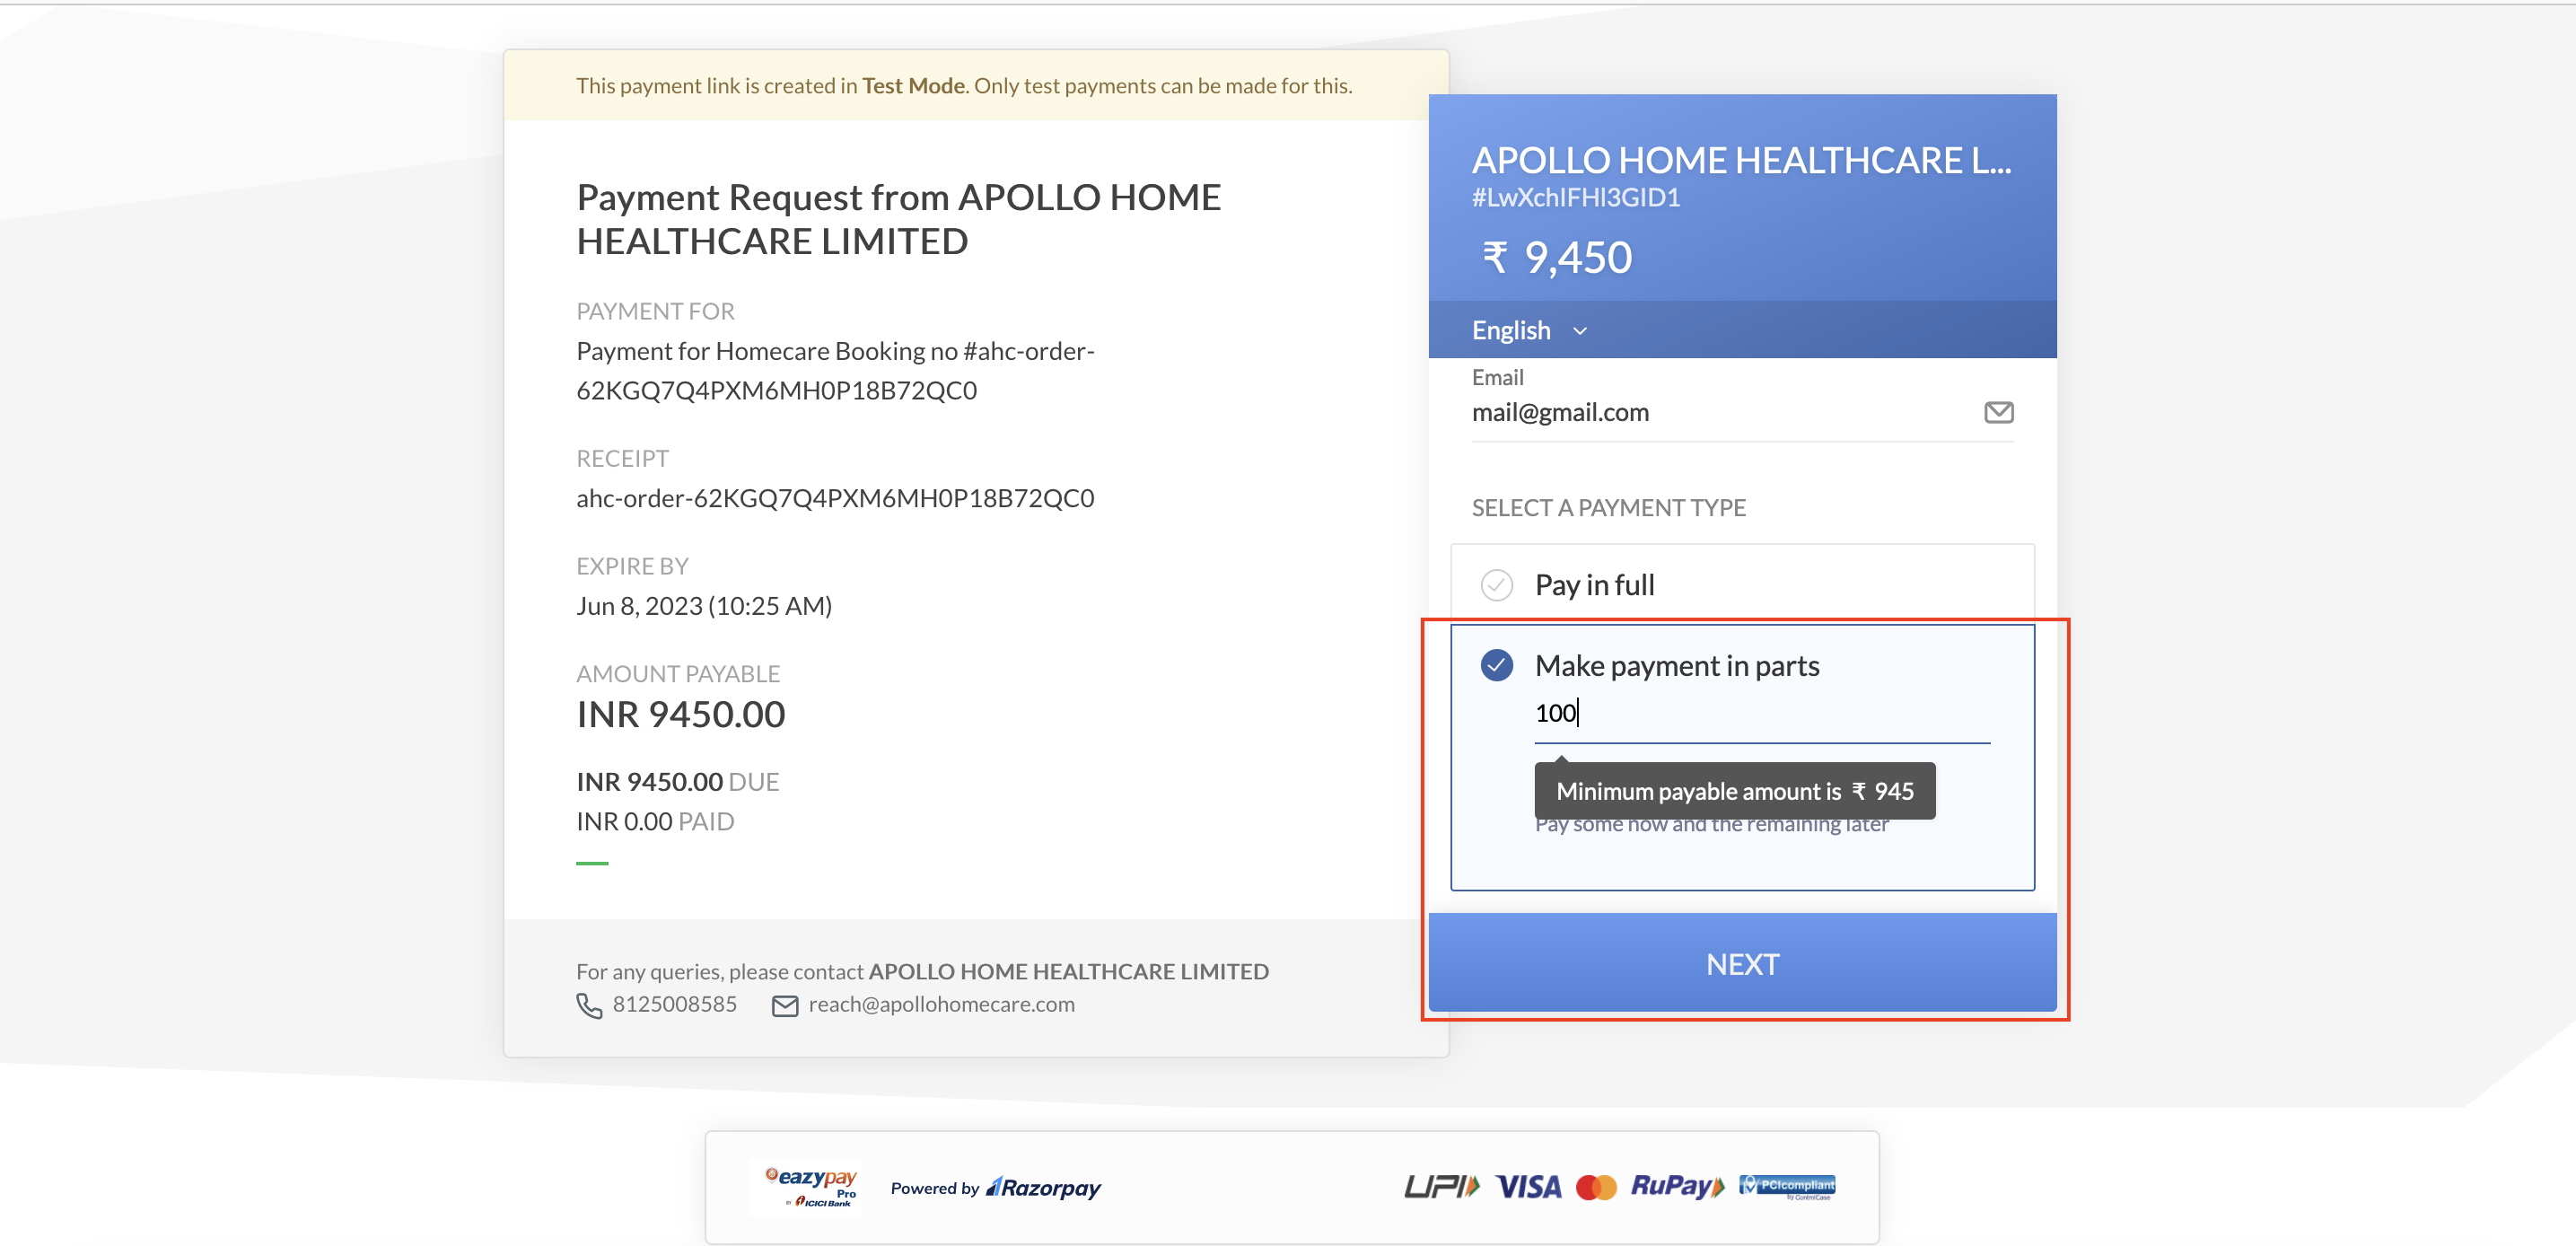
- In case if the patient selects "Make Payment in Parts" - System will ensure minimum amount is collected (Logic is defined)
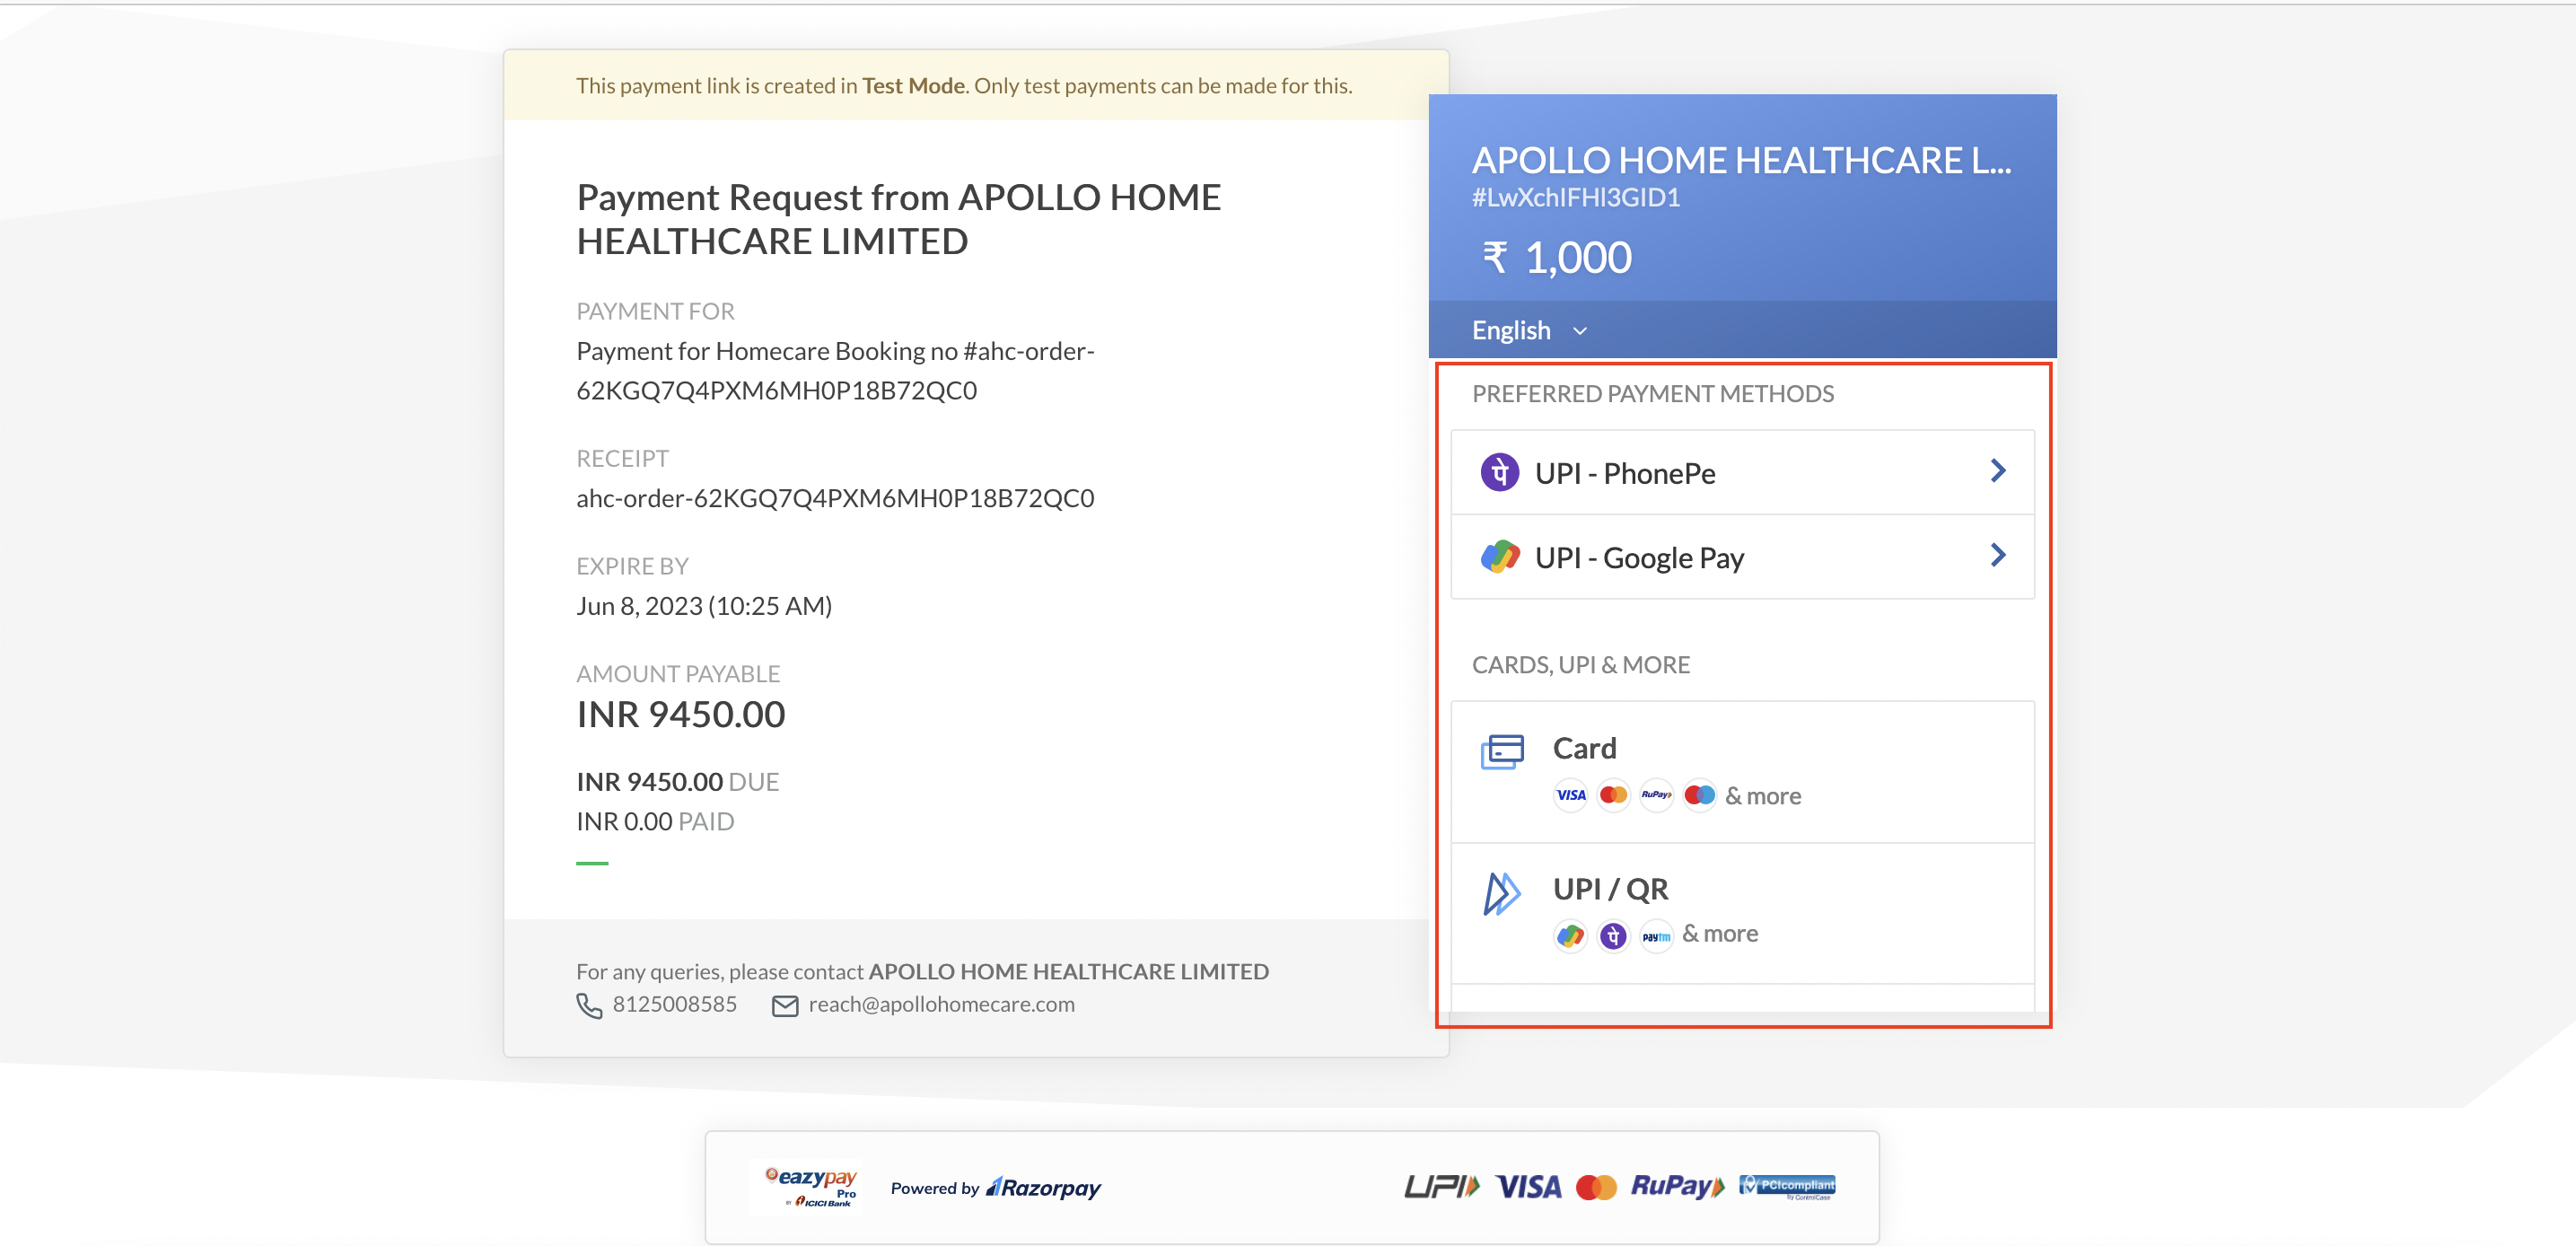
- Selects the payment method (UPI/Netbanking so on...)
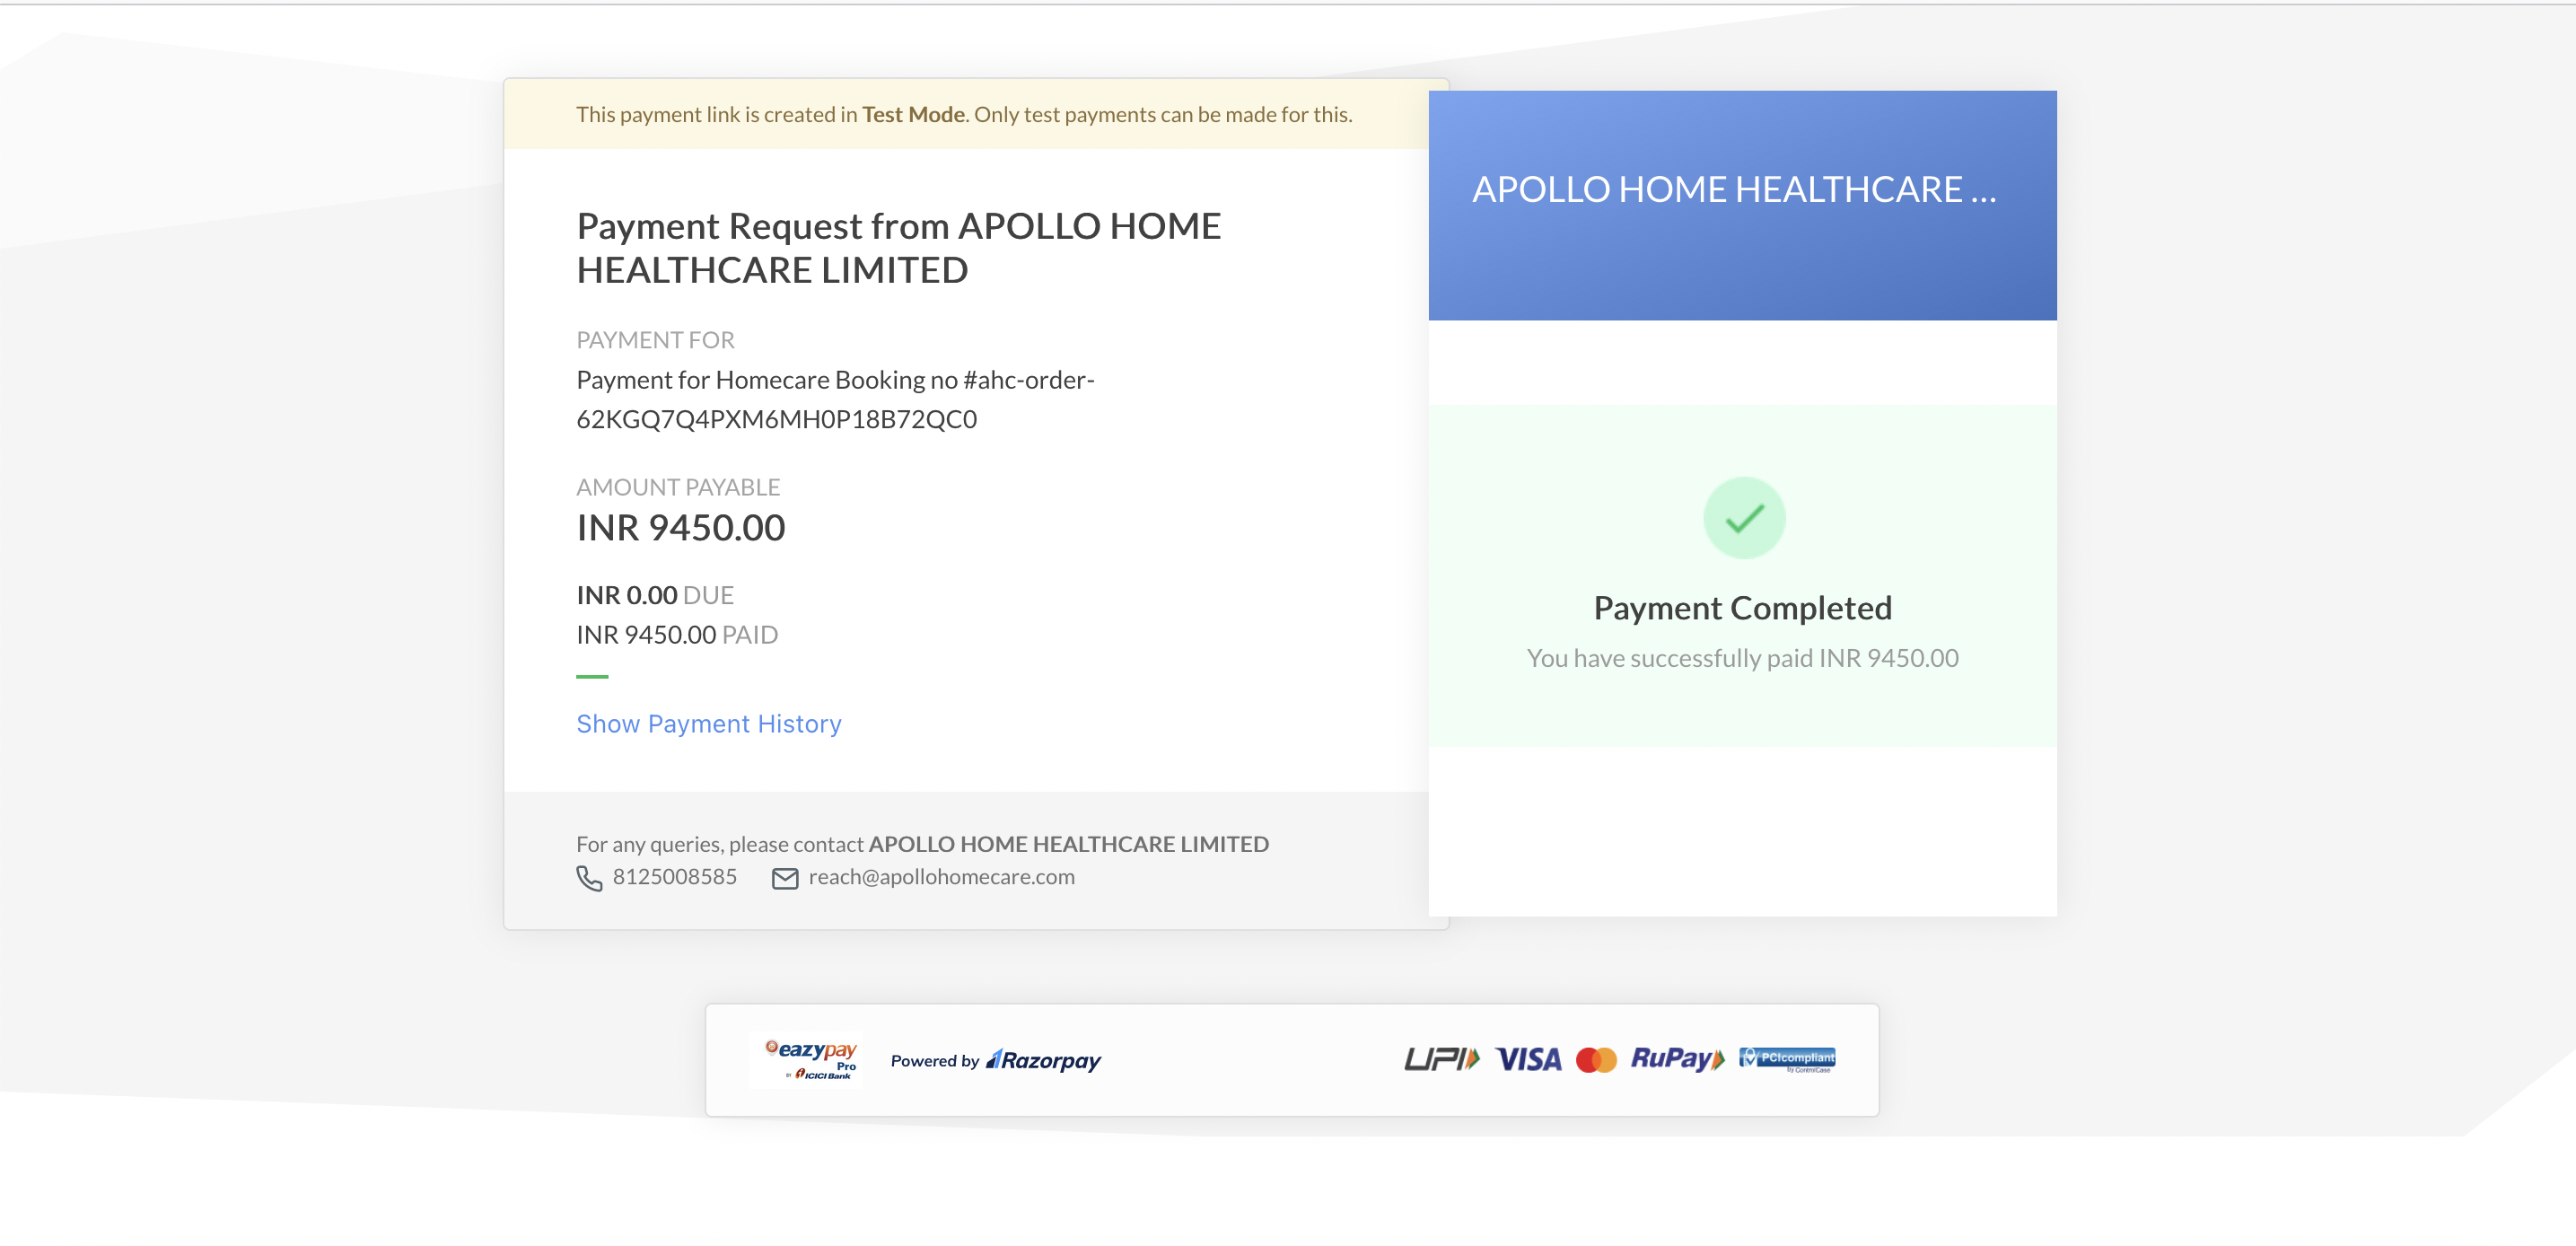
- Once the payment is completed - System will show "Payment Completed"
- System will automatically updates the status to "Paid" in case of full payment
- System will automatically updates the status to "Paid" in case of partial payment
Accepting Estimation & Consent
Payment Gateway
Minimum Amount
Payment Options
Payment Completed
Cash/NEFT
- Goto Booking Page
- Post Clicking on Confirm from Update Status
- Click on Accept from Update Status
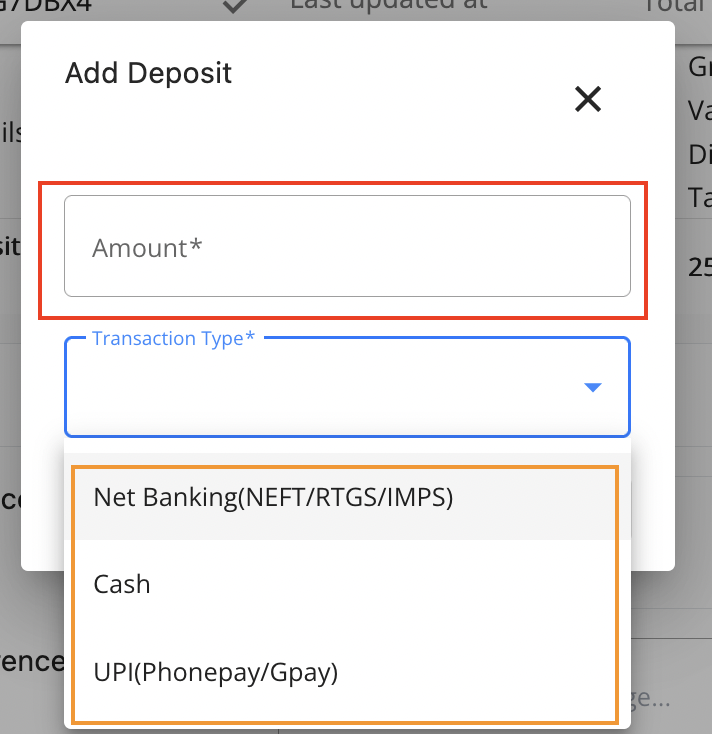
- Post Clicking on Accept, Click on Add Deposit button
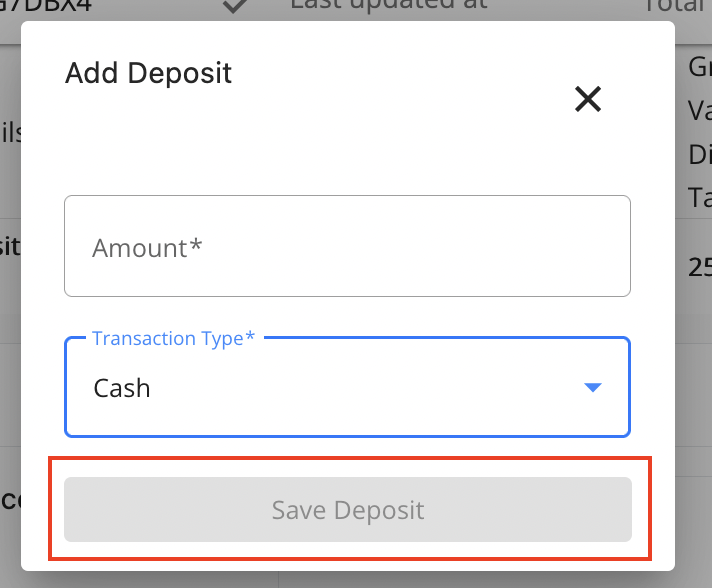
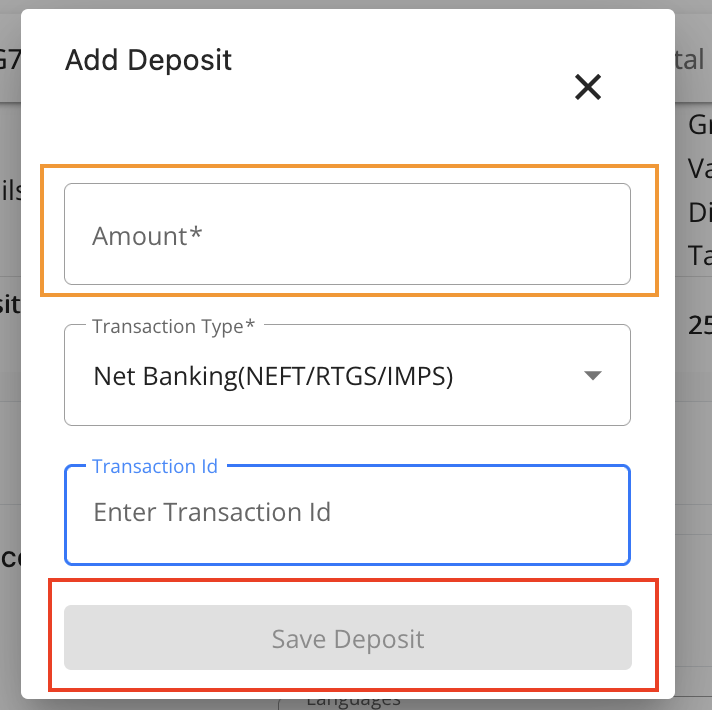
- Enter Amount
- Select transaction type - Cash | Net Banking | UPI
- In case of Netbanking/UPI - Please enter the Transaction ID
- Click on Save Deposit
Add Deposit
Add Deposit POP Up
Enter the amount, Select the Transaction Type
Cash Selectoin
NEFT/RTGS/IMPS Selection
Whenever you select NEFT/RTGS/IMPS enter the transaction ID
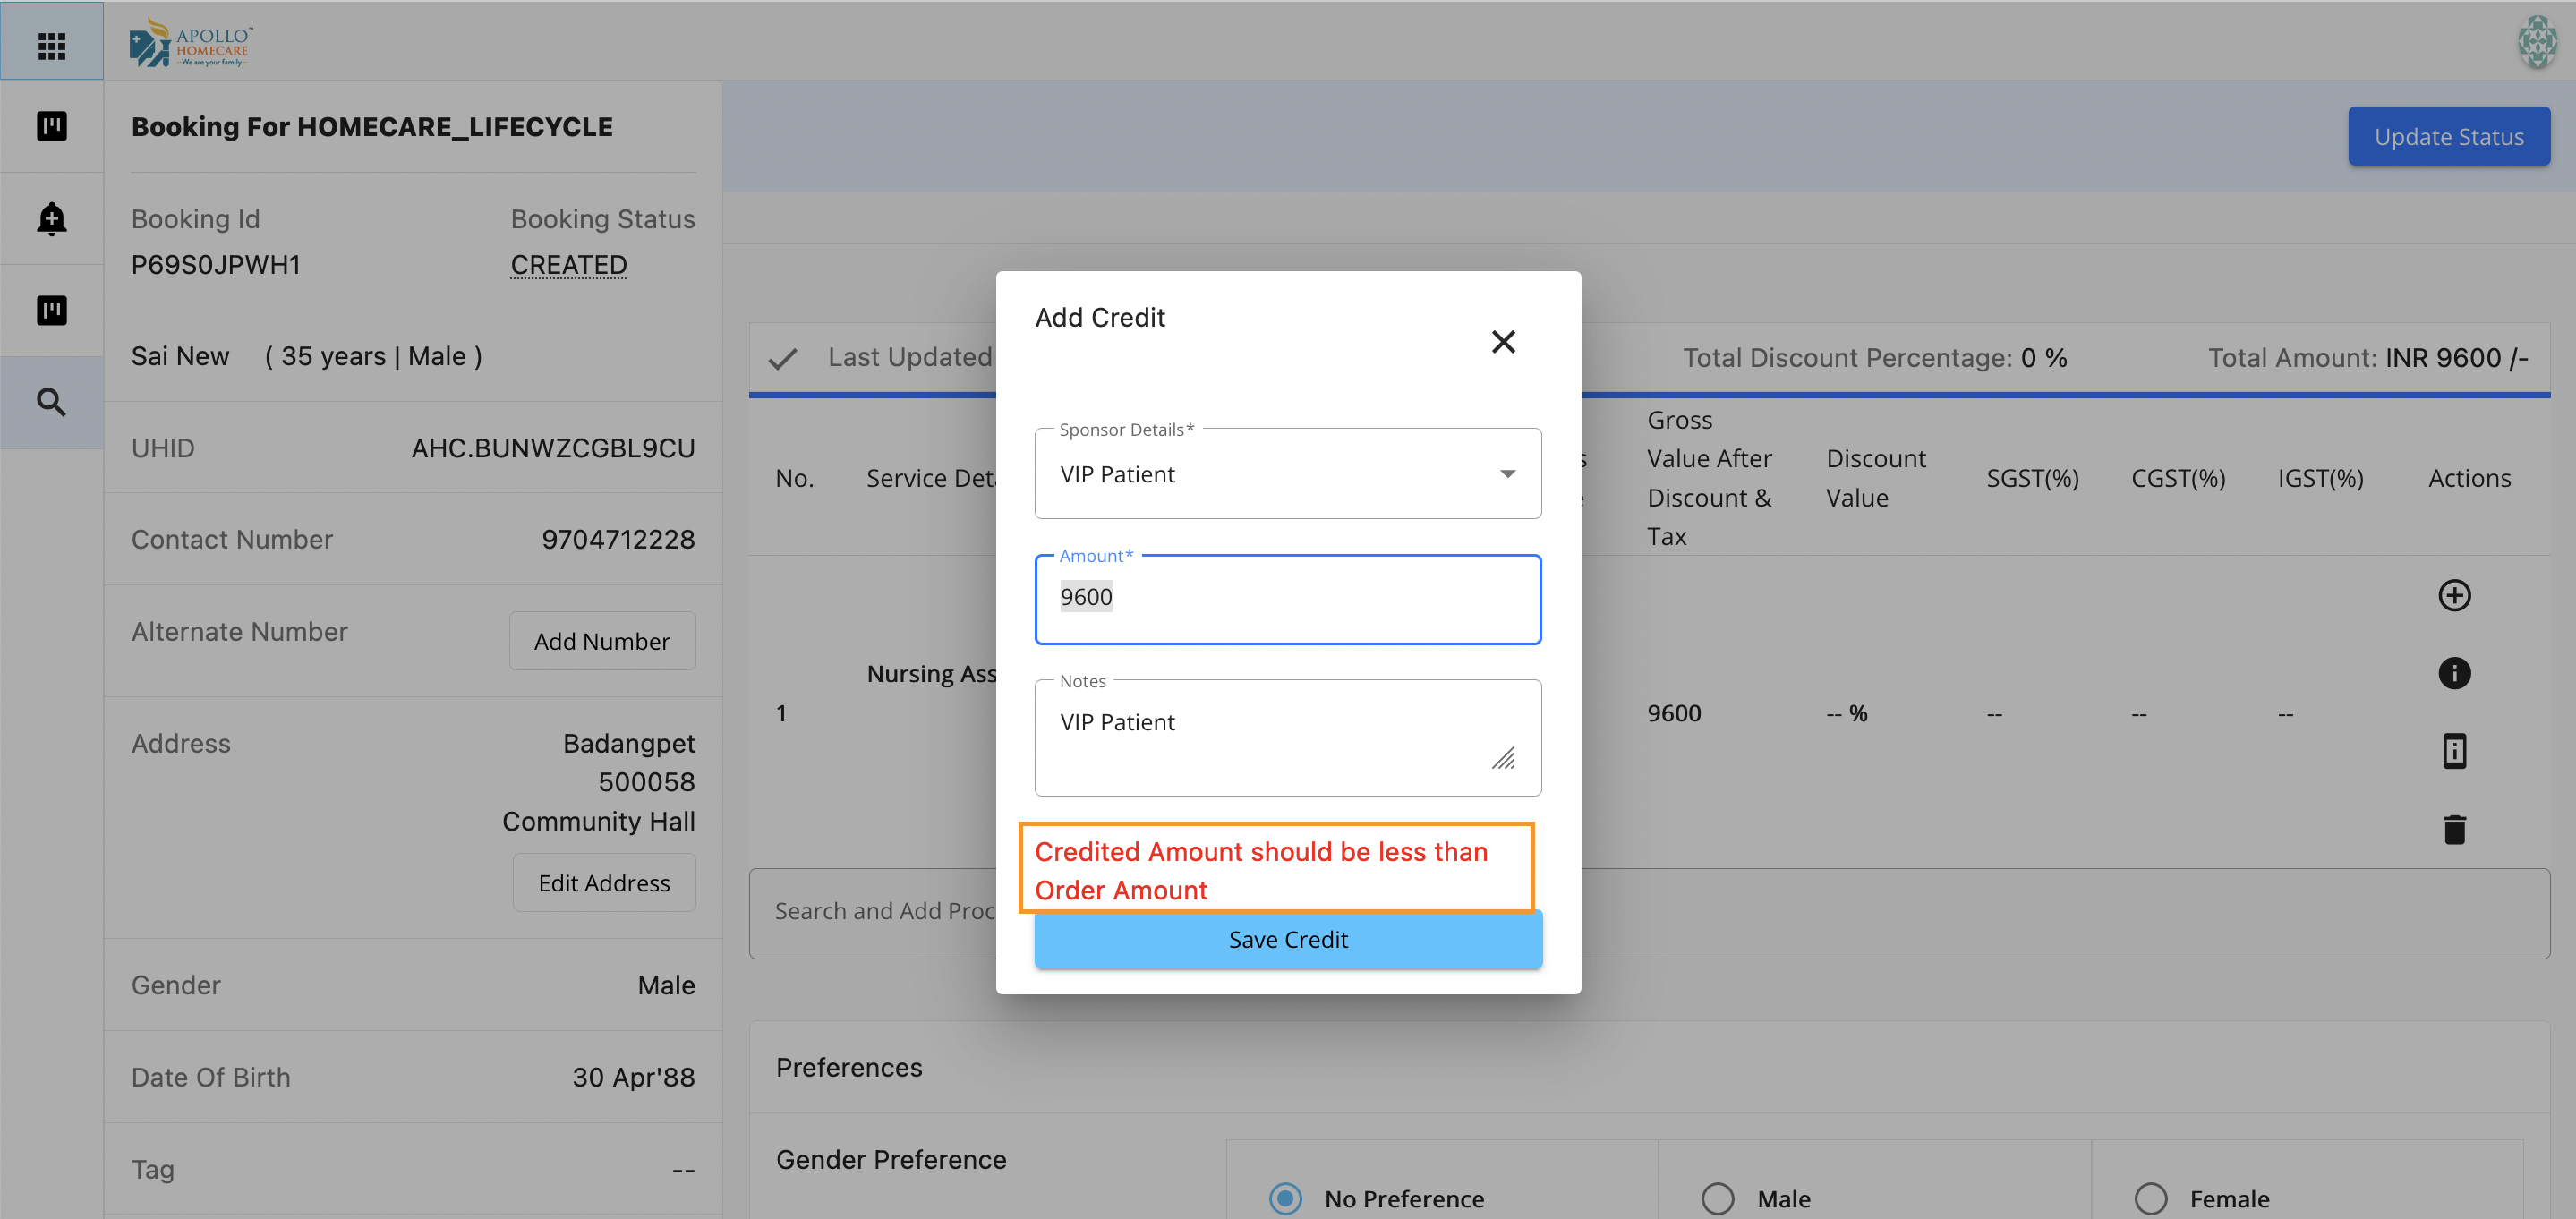
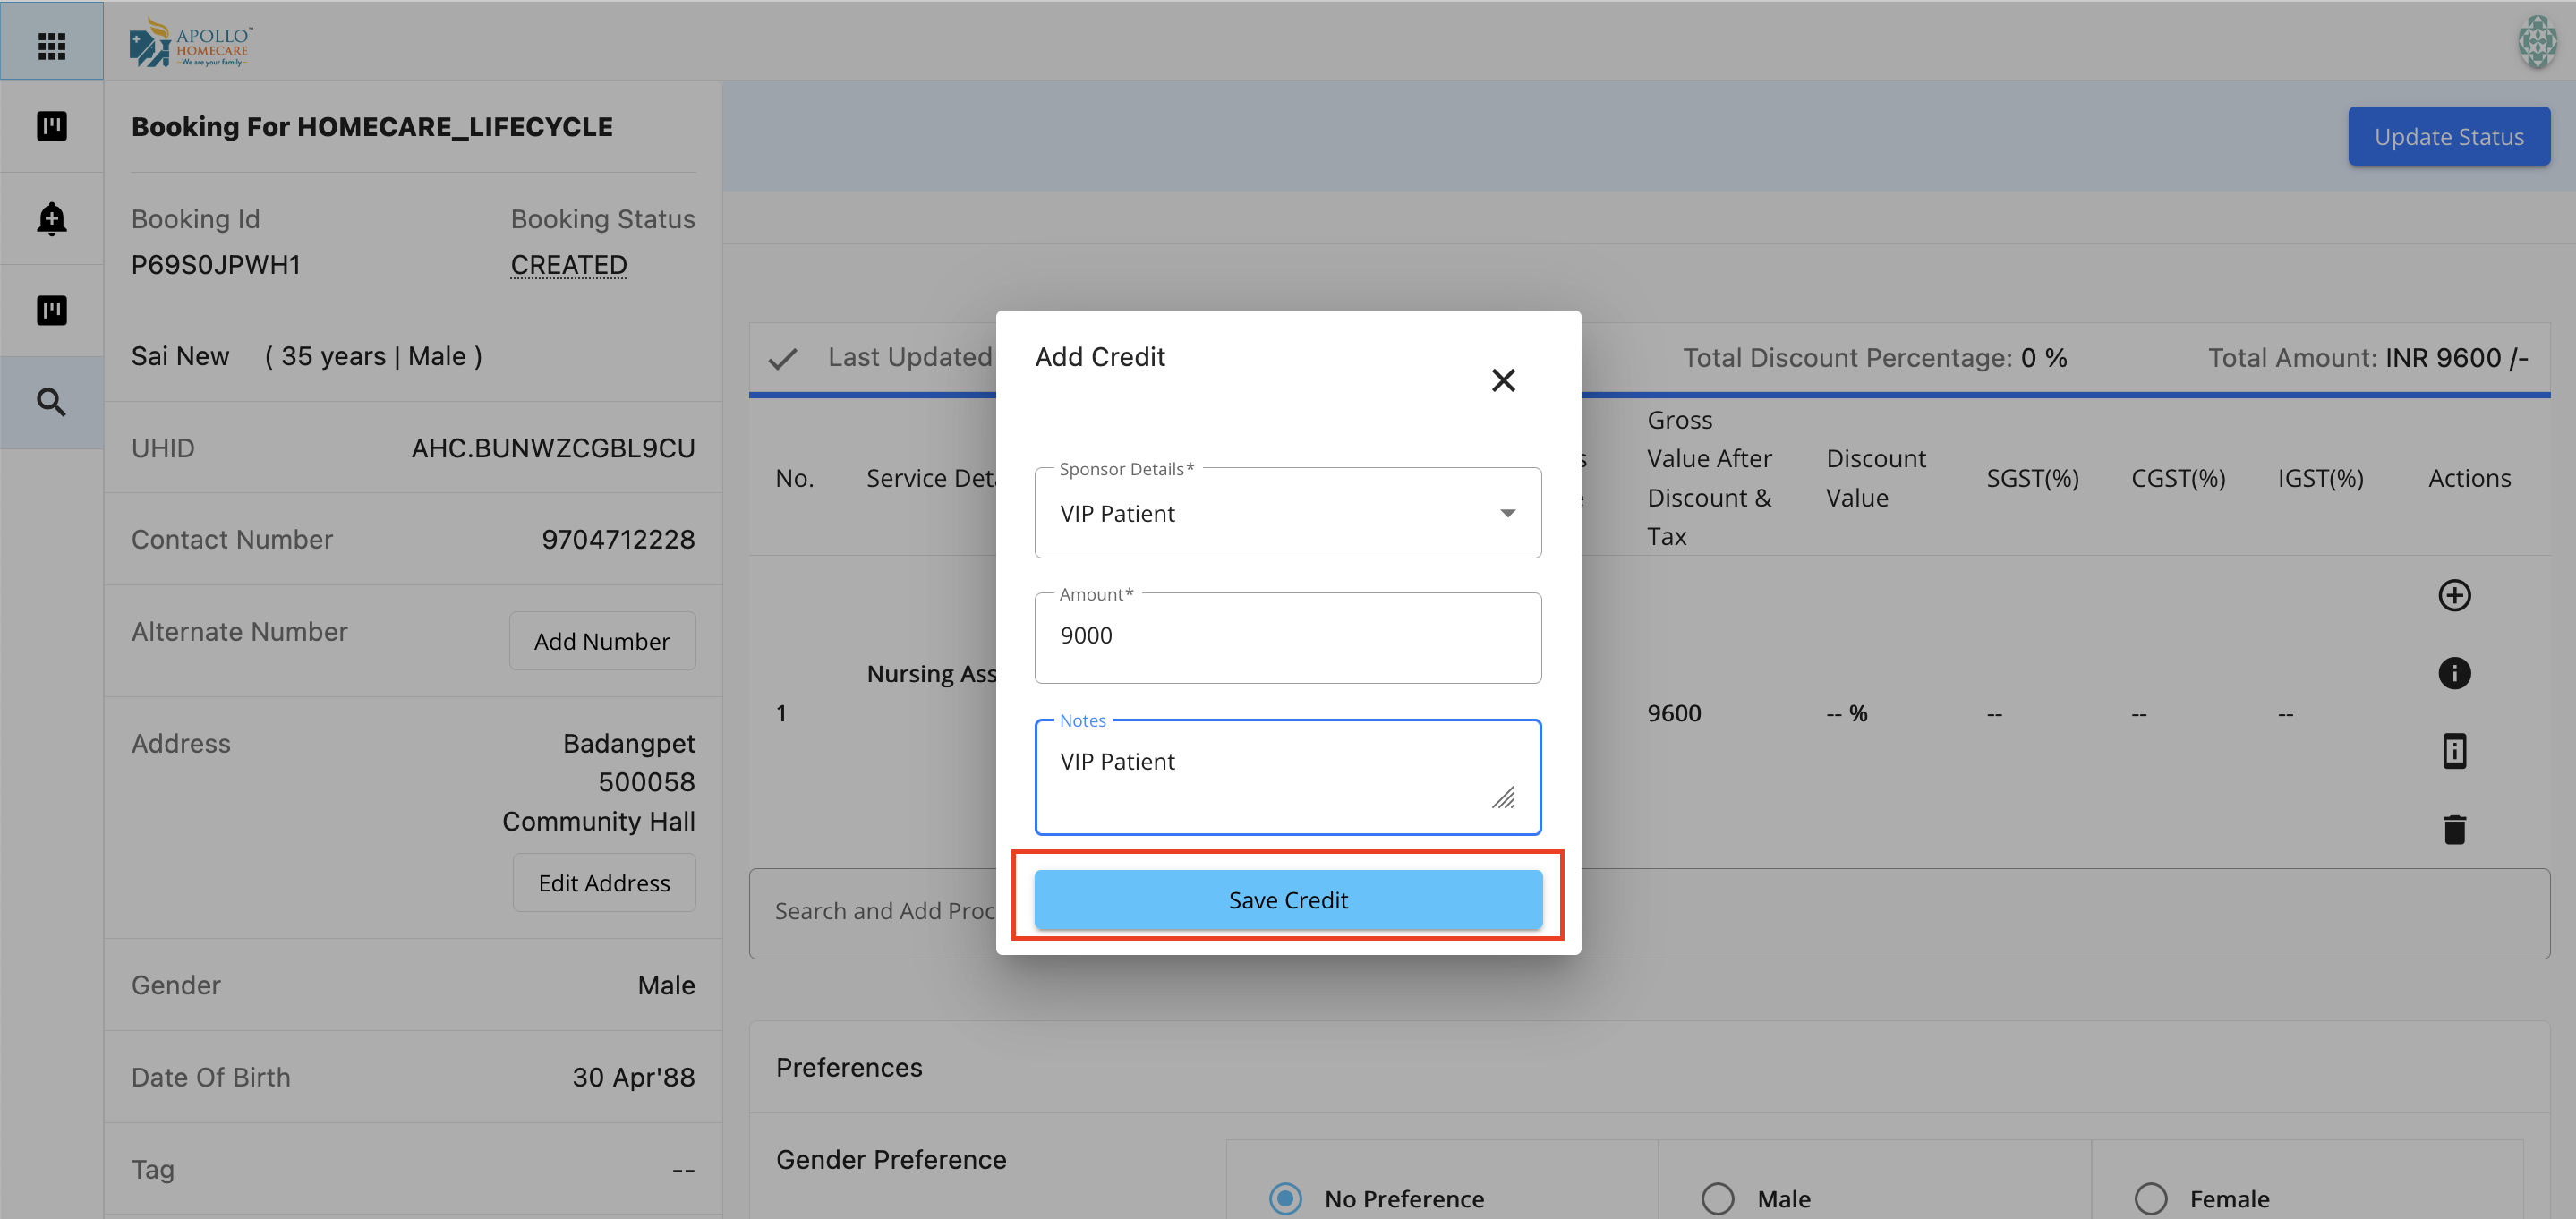
Credit
Add Credit
Credit option is available for VIP patients, Corporate patients and Hospital patients.
- VIP patients: These patients will be paying after the completion of service.
- Corporate patients: For these patient payment will be done by the corporate insurance organisation.
- Hospital Patients: The payment for this patient is included in the hospital bills.
If above criteria is matched, we will add the required services in the booking page - click on the button ‘Update Status’ and select the option ‘Confirm with Credit’.
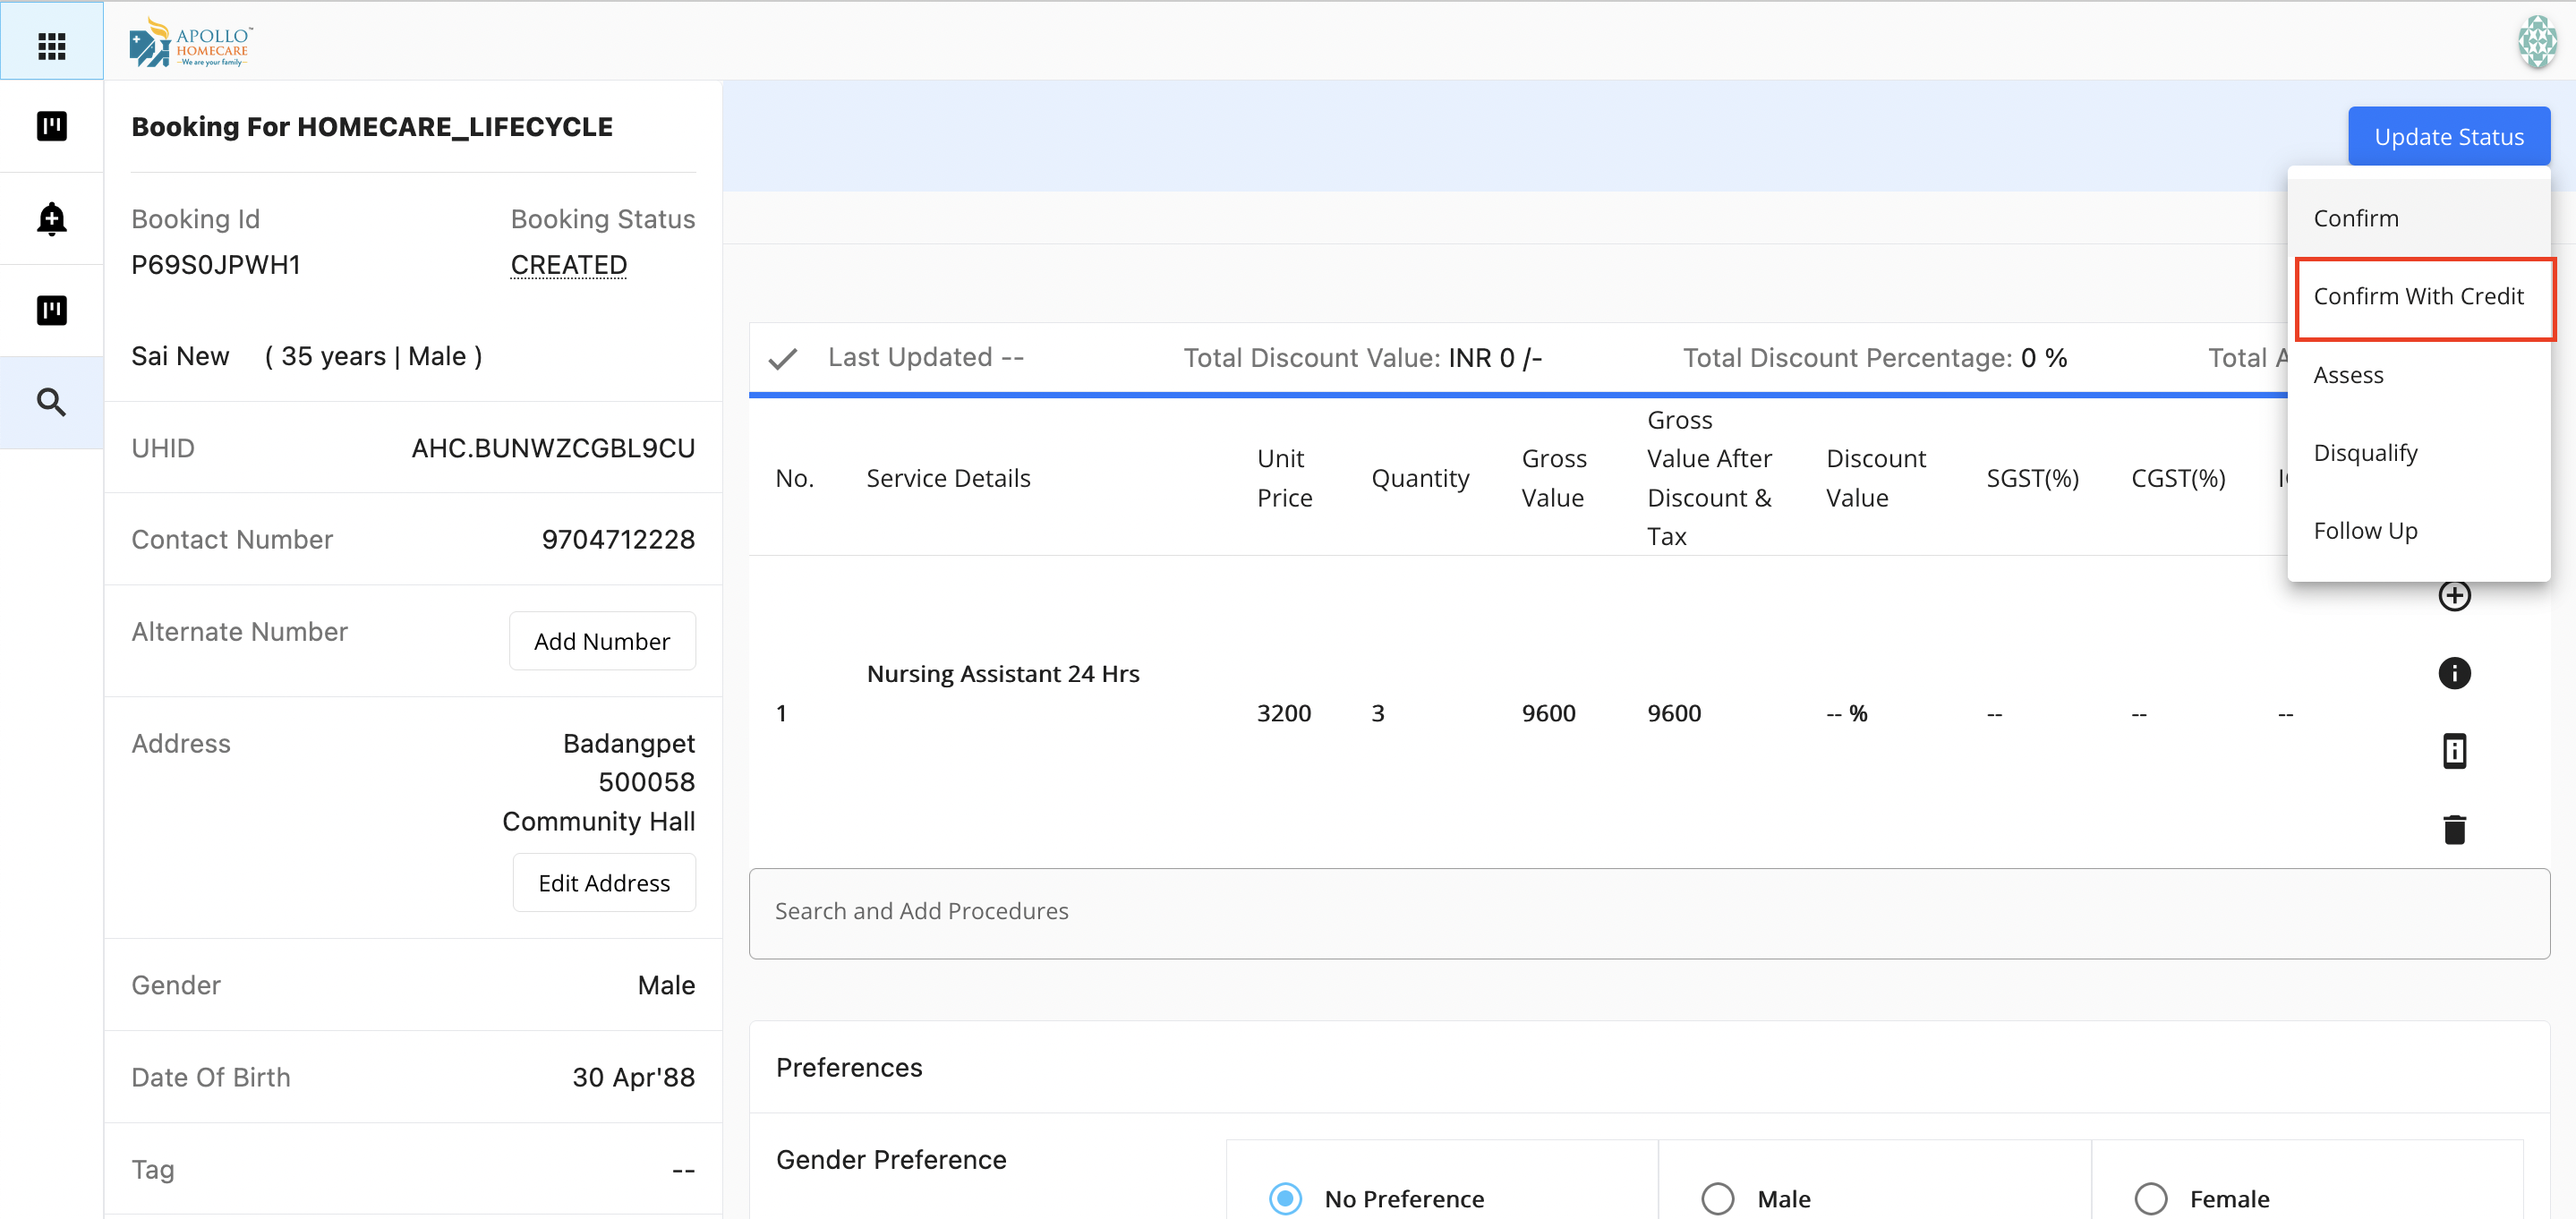
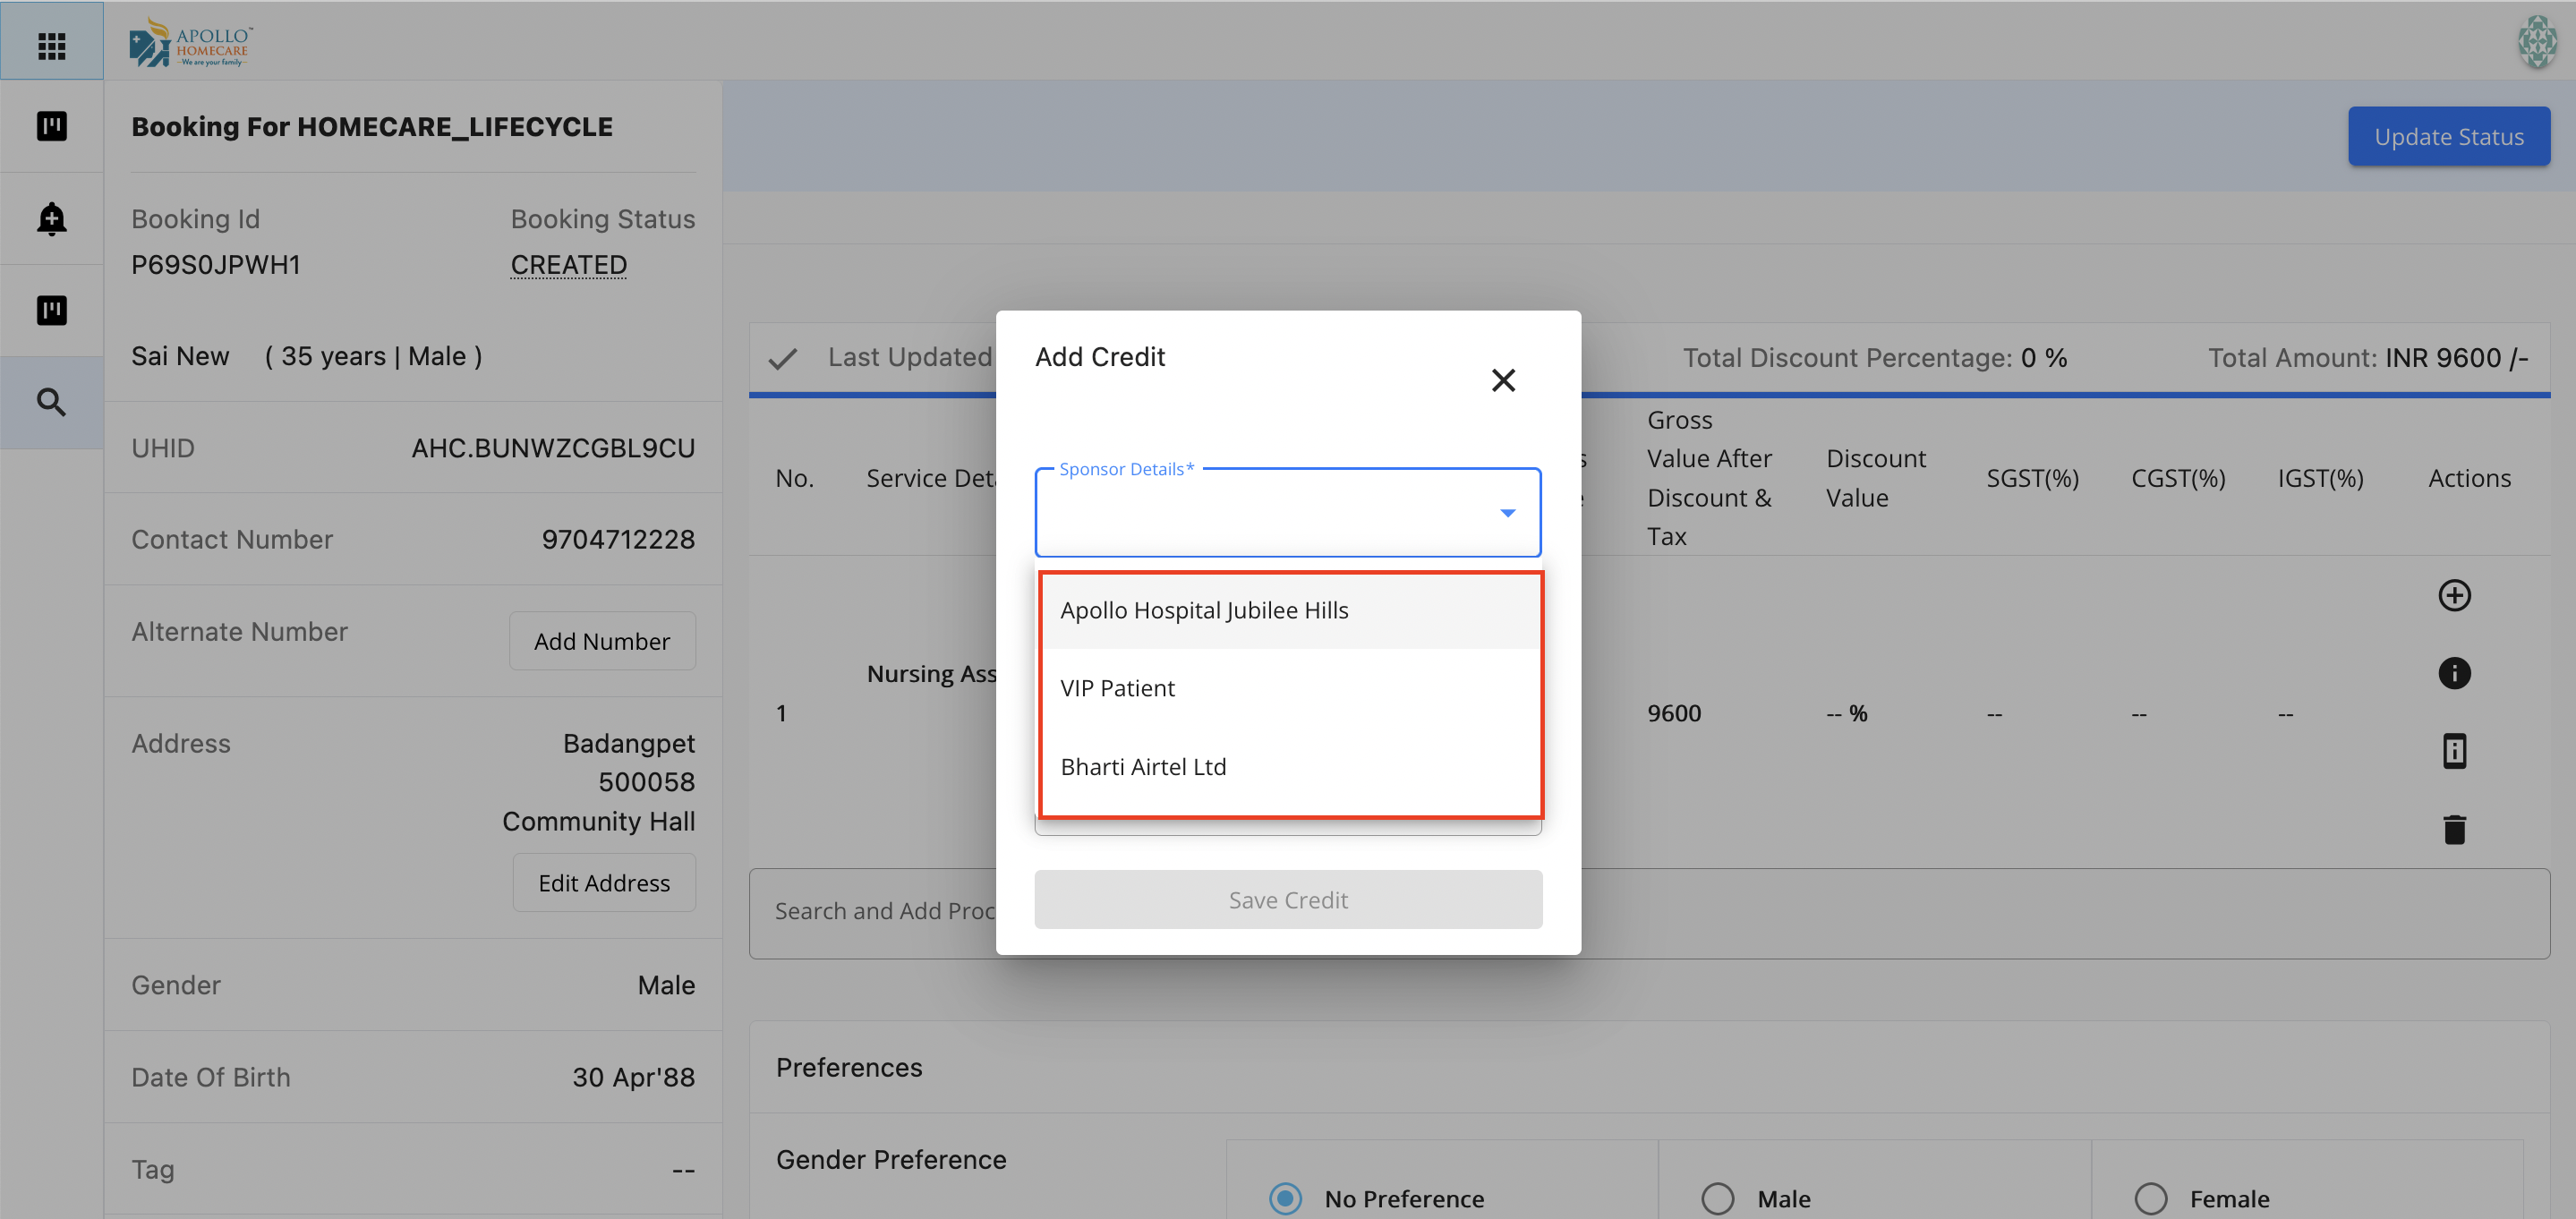
A popup is opened, select the sponsor details such as Hospital or VIP or Corporate.
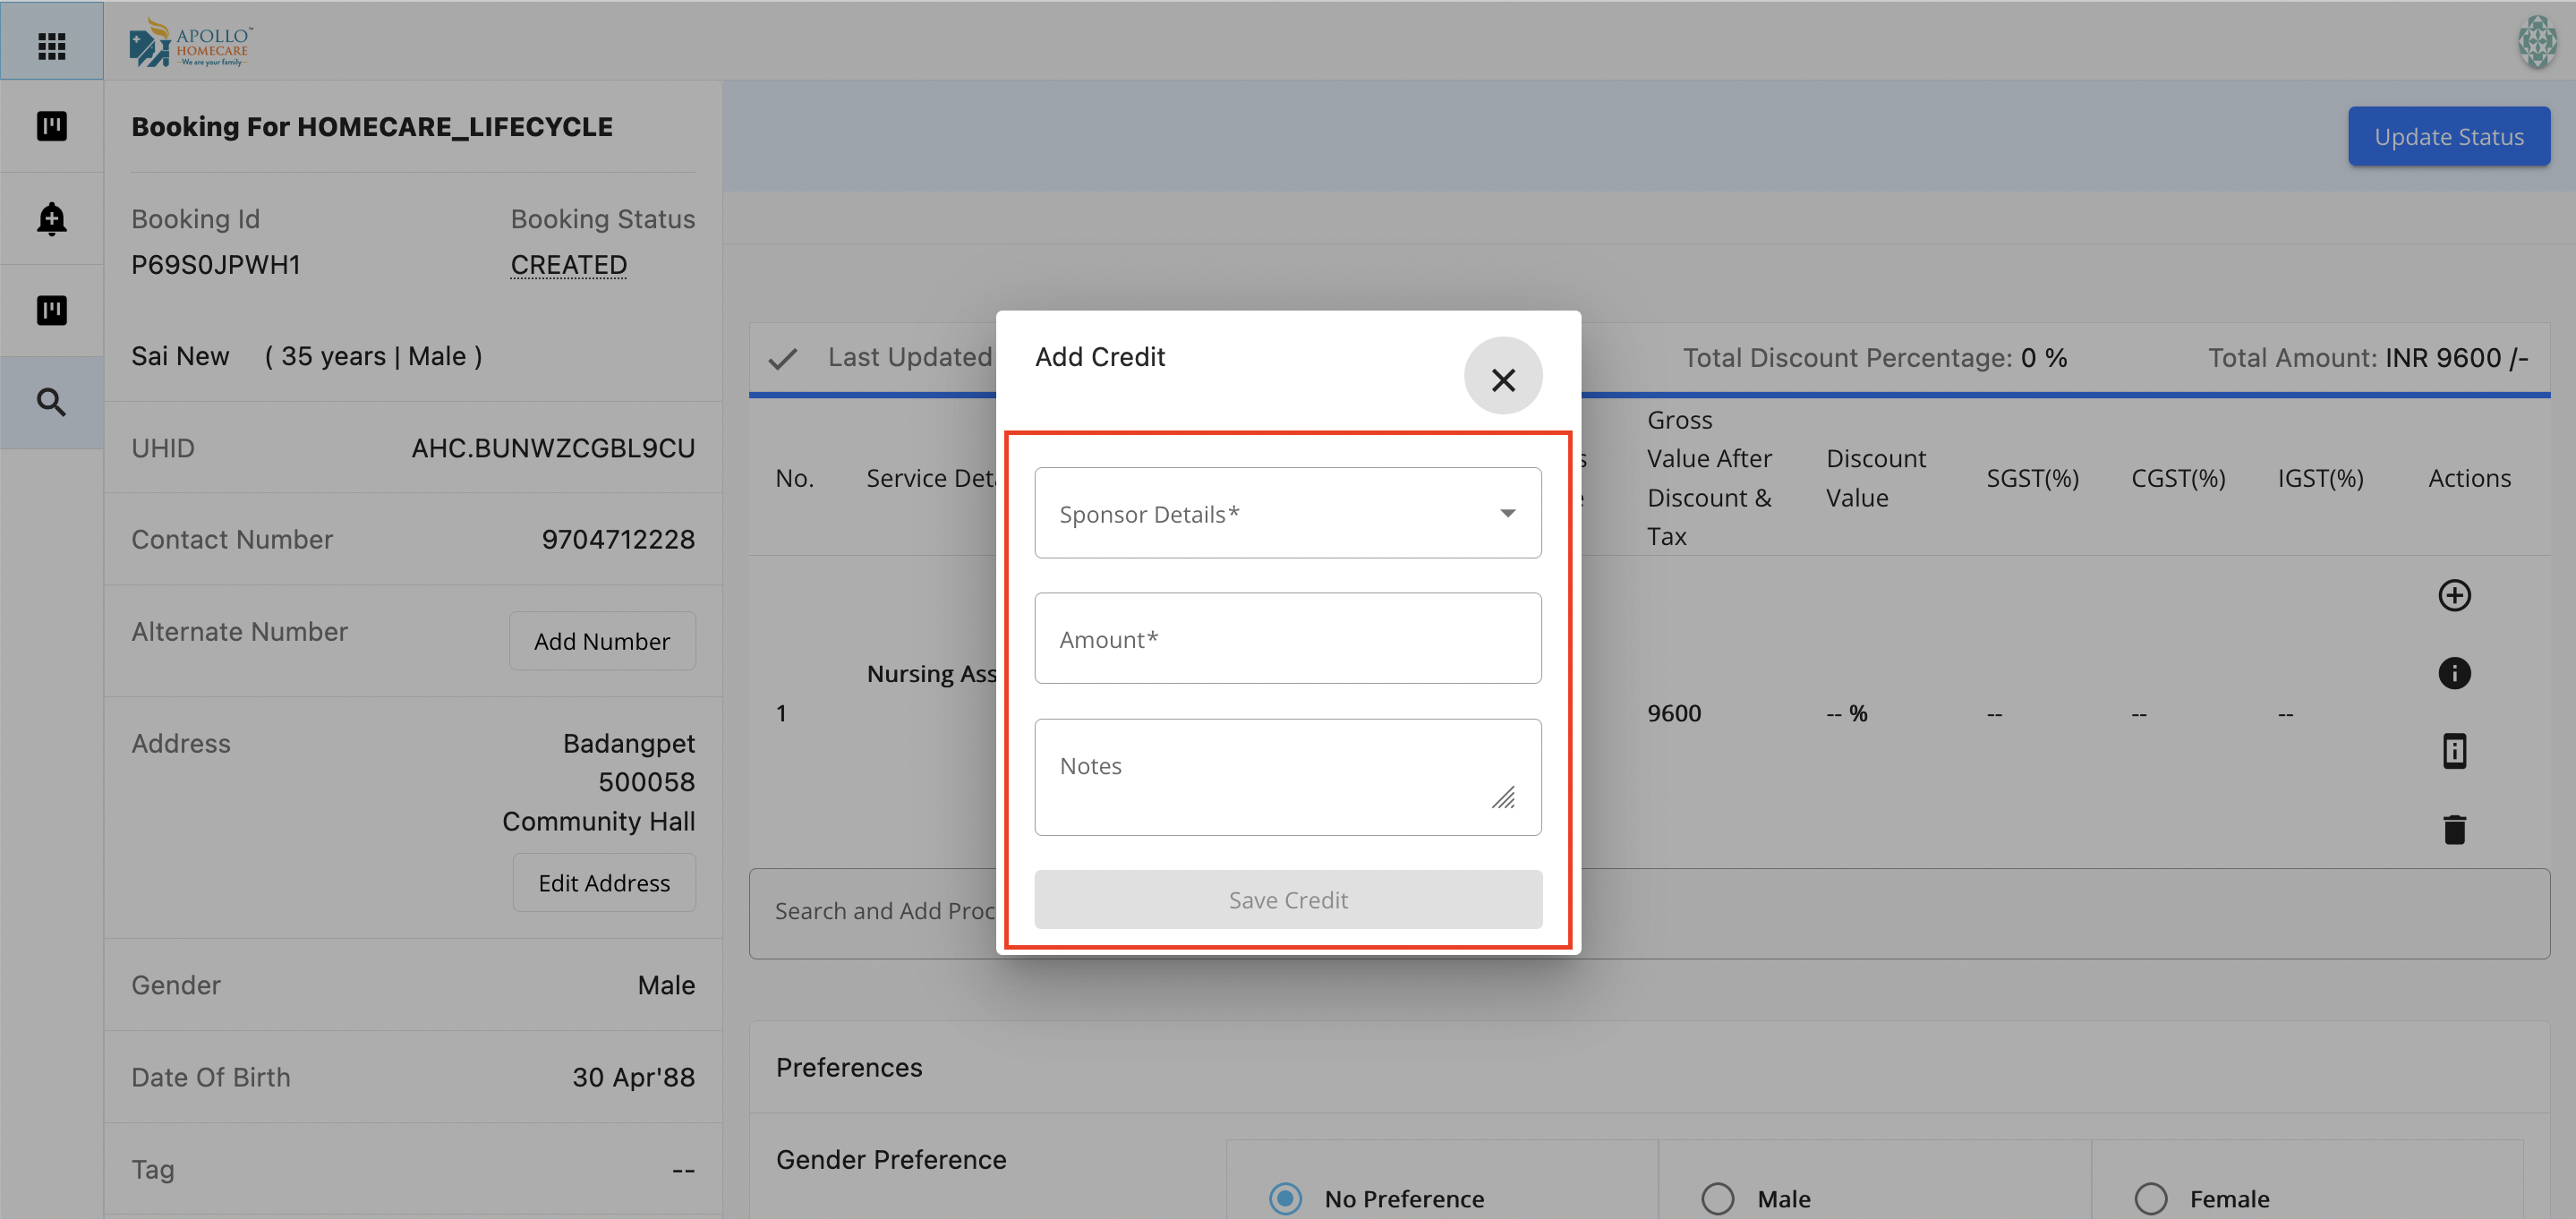
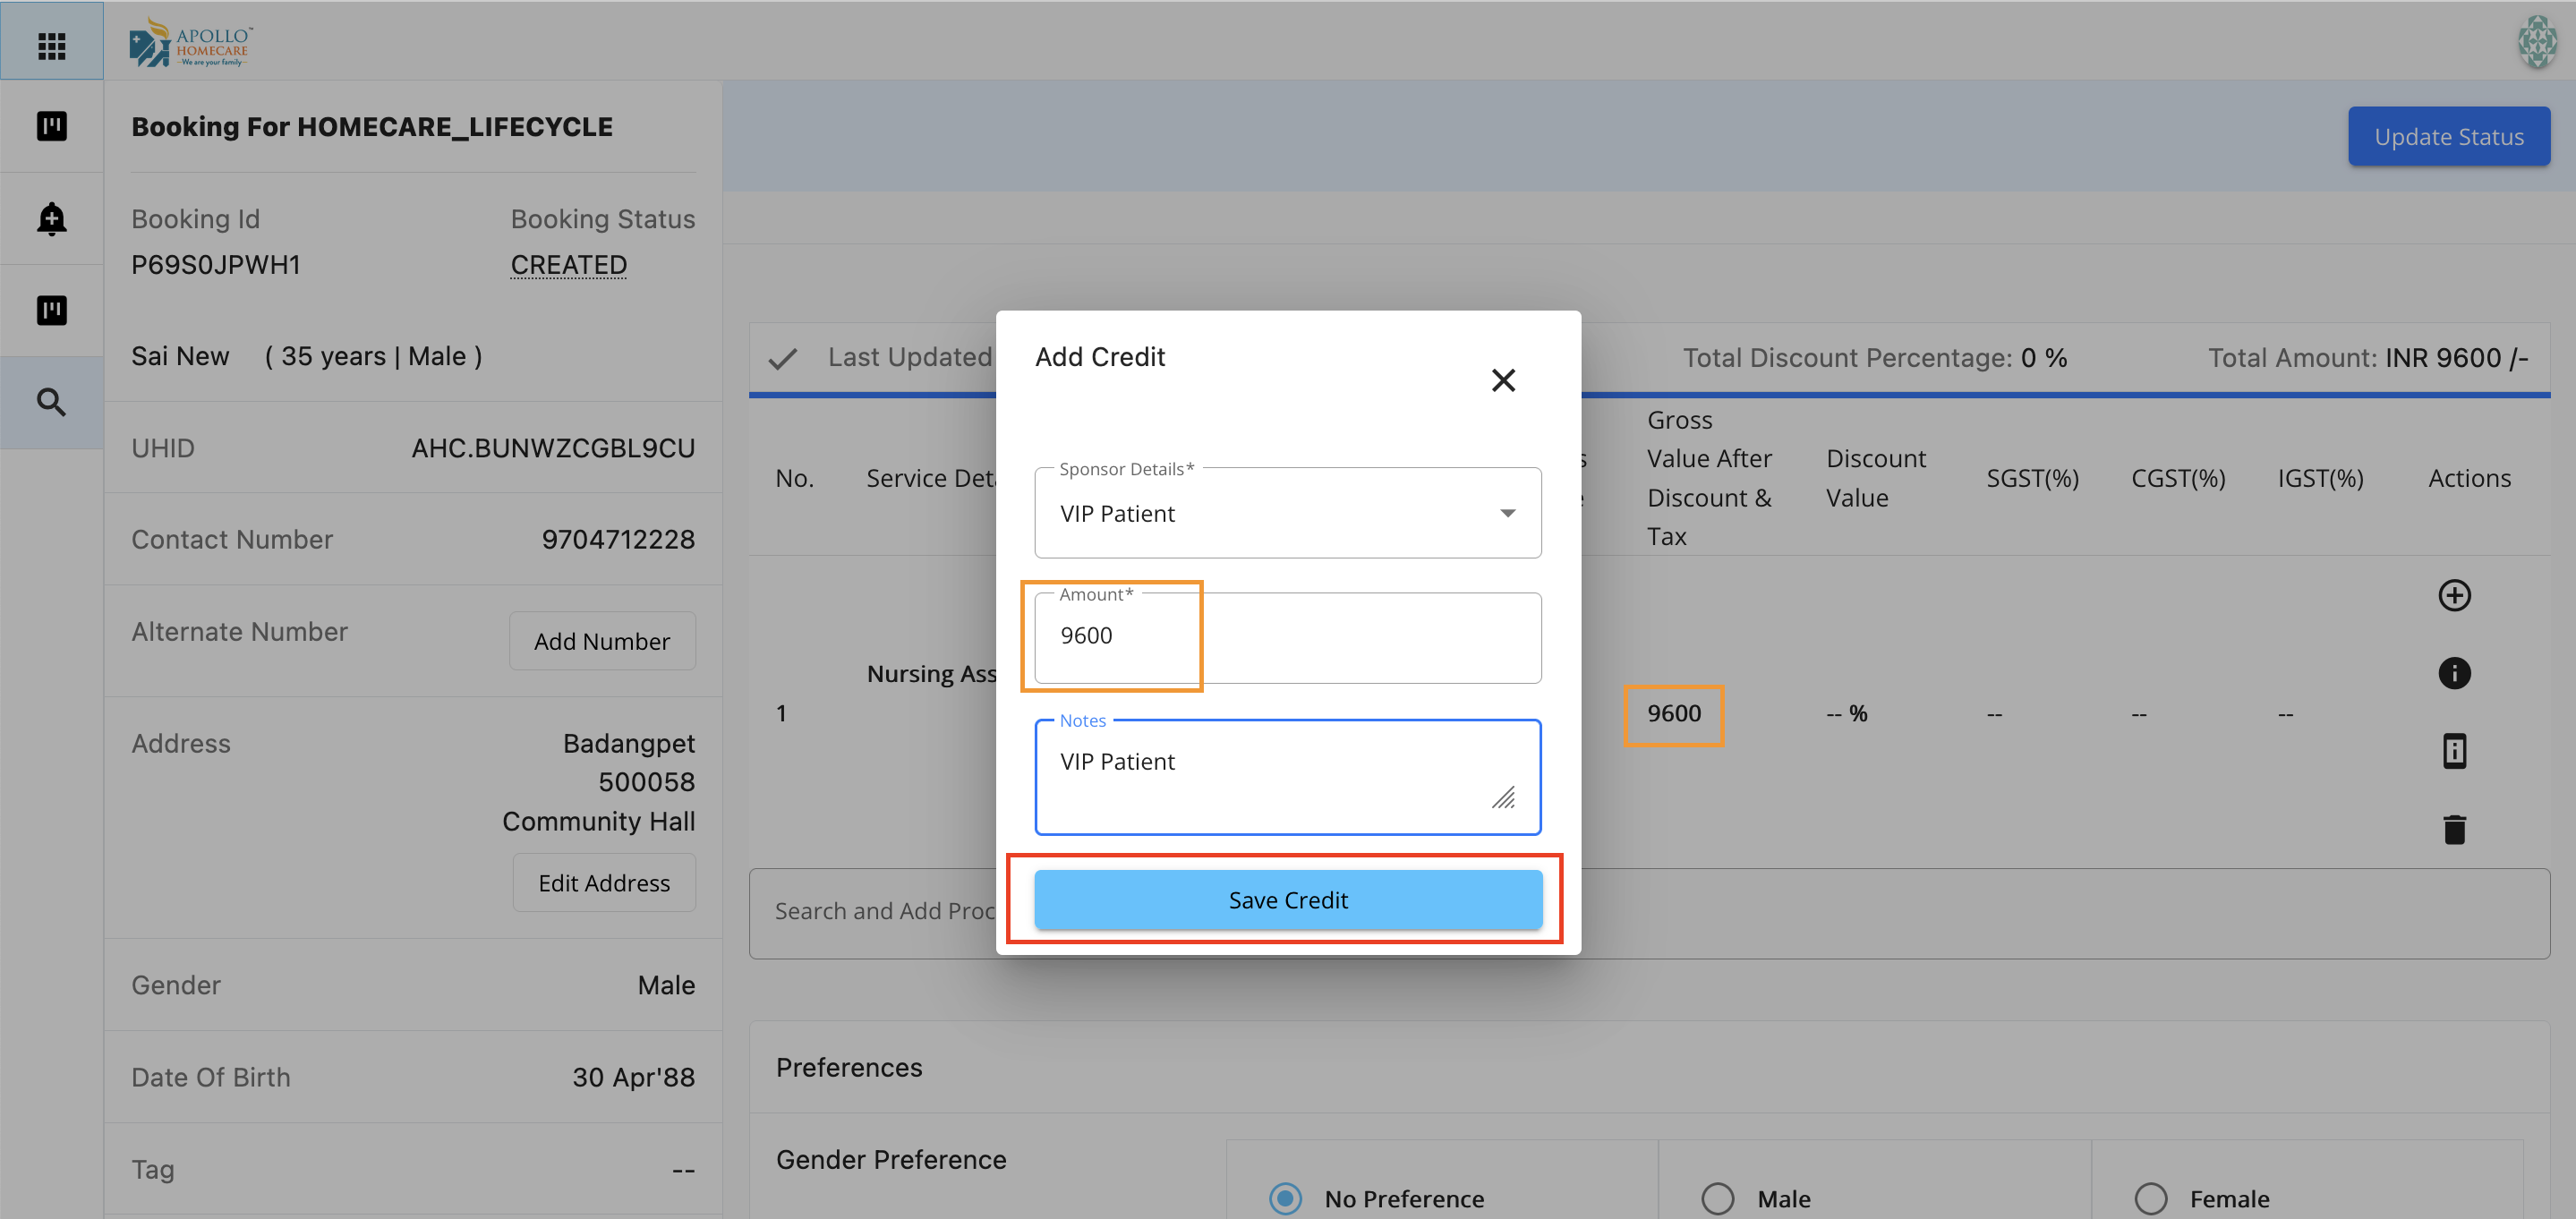
Now add the credit amount in the amount field and add notes if required.
If the credit amount added is equal to/more that the order amount the system will not accept. The credit amount should be less than the total order amount for the services added
Now click on ‘Save Credit’ a popup is opened for the confirmation.
Click on the ‘Confirm’ button, booking is saved and sent for the approval from Unit Head or Corporate head based on the credit amount.